


If you are familiar with development on PCs using Microsoft’s tools, you know most of what you need to develop for Tablet PCs.
The main addition in the Tablet PC development arena is that of Digital Ink and the features that go along with it, such as Ink collection, Ink management, and Ink recognition. There are also a few minor additional things, such as new user interface considerations and screen operation in portrait mode.
Development for Tablet PCs and Mobile PCs is not a very unusual trade anymore, and Tablet PC functionality moves into the mainstream with Windows Vista. Mobile PCs (laptops) are already outselling desktop PCs in the US. The combination of these two facts means that every developer should be aware of Mobile- and Ink-enabled scenarios, as there are very few client applications that do not need to consider these environments anymore.
Every developer needs to be familiar with Mobile PC and Tablet PC development.
For this reason, the entire magazine you are holding in your hands focuses on Tablet PC and Mobile PC development. The aim is to arm you with all the information you need to successfully implement applications that take advantage of mobile and tablet features. A number of in-depth articles provide technical guidance on topics related to the subject. If you read this issue of CoDe cover-to-cover, you will have a good idea of everything that is involved and needs to be considered.
Before diving into all those details, you should take a look at the big picture and see how it all fits together. This article focuses on Tablet PCs and is meant to be a quick overview; for the details, check out the other articles in this issue.
Capabilities and Opportunities
Tablet PCs are regular PCs. Some developers and users still think that Tablet PCs somehow run on a special operating system, such as Windows CE,which is not the case. (Fortunately, the group that holds that belief seems to be shrinking.) The first generation of Tablet PCs (pre-Windows Vista) runs on a special version of Windows XP, called the Windows XP Tablet PC Edition. This is a super-set of Windows XP, which means that absolutely everything Windows XP has to offer is also available on Tablet PCs. In addition, there are components that are specific to Tablet PCs, such as Digital Ink collection components, and also some Tablet PC-specific applications, such as Windows Journal.
In the Windows Vista timeframe, Tablet PC functionality moves into the core operating system. For this reason, some people say that every version of Windows Vista is a Tablet PC OS. There is a lot of truth to that, although technically, there still will be a special version of Windows Vista for the Tablet PC containing components such as the TIP (Tablet PC Input Panel), which simply make no sense on a non-Tablet computer. These components and applications generally fall in the realm of accessories. Core Tablet PC functionality, such as the support for Digital Ink, is, in fact, available in all versions of Windows Vista. (For more information on Windows Vista Tablet PC features, see the “Into the Future” article in this issue.)
The main feature of Tablet PCs is the support for Digital Ink. Users can write on the device with a special stylus (the pen) that is recognized by the Tablet PC through an electromagnetic digitizer (and in future versions, through touch-sensitive displays). Digitizers sample stylus information at a very high resolution and at a very high sampling rate. Sampled information includes X and Y coordinates of the pen at a given point in time, and additional information such as pressure, and, depending on the actual hardware and developer choice, pen rotation, pen angles, and more.
Stylus data is received by the operating system and can be interpreted in different ways. For instance, pen information can always be interpreted as mouse input. In many scenarios, a series of pen data packets (individual measurements) is interpreted as a stroke of Ink-a line or curve based on a series of points. Strokes are generally drawn on the screen, generally in real time, and thus form the illusion of ink flowing from the pen or writing on the display.
Such Digital Ink can be used in a variety of ways. Users can take handwritten notes that get preserved as handwriting the same way they were originally written. Although such notes are really just series of lines, the Tablet PC ink recognizer can analyze these lines and turn them into meaningful data, such as text. This allows users to search their notes, or even to turn handwriting into regular text.
Digital Ink is also useful in combination with other data, such as text documents or images. Users can annotate their documents with attached Ink. All the new Microsoft Office products provide good examples of such scenarios.
Not all Ink is interpreted as handwriting. Perhaps the user is drawing lines, squares, and rectangles in an effort to draw a diagram. Or how about recognizing hand-drawn musical notes in a sheet music application?
A completely different way to look at pen input information is to interpret it as gestures. The user may draw a circle or a quick line to the right, or a similar gesture, which can be interpreted as a certain action. Or perhaps the user scratches out an area of the screen (a zigzagging line drawn back and forth over existing content), which can be interpreted as a delete operation for the data scratched out.
Possibilities are only limited by your imagination. Ultimately, the goal of Tablet PCs is not just to duplicate the experience of writing on paper, but it is to significantly improve that experience by adding functionality, fidelity, and features that are not available on a pad of paper.
Getting Started
To get started with Tablet PC development, you need either a COM-based (Visual Basic 6 or Visual FoxPro for instance) or a .NET-based development environment. We here at CoDe, of course, recommend Visual Studio (.NET) and will use it for the examples in this article. You also need the Tablet PC SDK, which you can download for free from the Tablet PC Dev Center (http://msdn.microsoft.com/TabletPC). You do not need an actual Tablet PC to develop Tablet PC applications, as the mouse can be used to emulate pen input. Once you engage in the development of a large Tablet PC application, you probably want to get yourself a Tablet PC so you can verify that the user experience and recognition quality is at the level you expect it to be. Initially, you can simply install all Tablet PC components on your desktop PC.
Tablet PC development is much simpler than most developers expect.
You may be surprised to learn how simple it is to build applications with the Tablet PC SDK. Features such as handwriting recognition, which arguably push the limits of what’s possible in computing today, are very easy to implement from a developer’s point of view.
Note that on a Tablet PC Operating System, all applications support Ink, to a certain extent, through technologies such as the TIP (Tablet PC Input Panel), which allows the user to use Ink in applications that do not support Ink natively (Figure 1).

Options for Ink Collection and Rendering
There are options when it comes to collecting Ink. For one, the Tablet PC SDK ships with a number of controls such as the InkEdit control, which you can simply drop on a form. It provides a textbox that can be used for standard keyboard text entry, as well as handwritten Ink entry, which can be stored as Ink or converted to regular text automatically. The InkEdit control is really a specialized version of the RichTextBox control.
Similarly, there also is an InkPicture control, which is a specialized version of the Picture control. As you probably guessed, this control can display a picture and allows the user to Ink-annotate over it.
These controls provide a quick way to add Ink functionality to your applications. However, the user experience provided (especially by the InkEdit control) is not particularly good. These controls should probably be seen as examples more than production controls. For real-life use, a more sophisticated approach is warranted and it is readily available to us in a variety of ways.
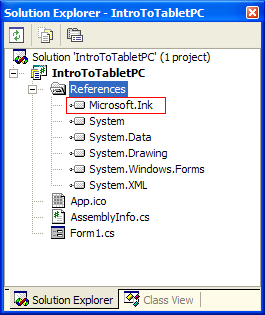
The standard approach is the use of InkCollector and InkOverlay classes. These classes can be attached to any regular control, which turns the control into an Ink-enabled control. To see these classes at work, create a new Windows Forms application/project in the .NET language of your choice. Add the Microsoft Tablet PC API assembly to your project’s assembly references (Figure 2). Then, drop a control of your choice onto the form. In my example, I use a Panel control with white background to simulate a white writing area. Then, instantiate an InkCollector object and attach it to the panel. To do so, you first have to create a field on the form that can hold the instance. In C#, this can be done like this:
public class Form1 : System.Windows.Forms.Form
{
    private Microsoft.Ink.InkCollector collector;

    // default form code continues here...
The Visual Basic version is similar:
Public Class Form1
   Inherits System.Windows.Forms.Form

   Private collector As Microsoft.Ink.InkCollector

    ' default form code continues here...
Then, in the constructor of the form, instantiate the InkCollector object and assign it to the control you want to Ink-enable. Any control will do, such as a panel, a textbox, or even the entire window. In my example, I attach the collector to the panel control. Here’s the C# version:
public Form1()
{
    InitializeComponent();

    this.collector = new
        Microsoft.Ink.InkCollector(this.panel1);
    this.collector.Enabled = true;
}
Once again, the Visual Basic .NET version is very similar:
Public Sub New()
    MyBase.New()

    InitializeComponent()

    Me.collector = _
        New Microsoft.Ink.InkCollector(Me.Panel1)
    Me.collector.Enabled = True
End Sub
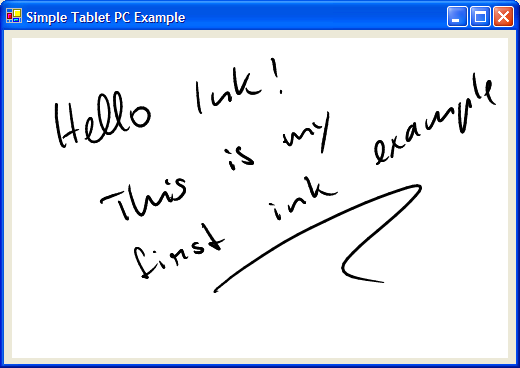
That’s it! Your first Ink-enabled Windows application is complete. Figure 3 shows the result.
Many Ink-enabled applications use this as the basis for all Ink features. The InkCollector class provides a great deal of functionality. It collects Ink, stores it in an Ink object and also renders Ink and makes sure it is always refreshed properly when it needs to be. Note that the rendering of the Ink is of very high quality, as the rendering engine applies techniques such as Bezier smoothing (making the line less jagged and more like a smooth stroke) and anti aliasing.
Using Ink collectors, it is also easy to change Ink attributes, such as Ink color. The following C# code snippet applies red as the default color for all future Ink input:
collector.DefaultDrawingAttributes.Color =
    Color.Red;
Remove the semi-colon at the end, and you have Visual Basic .NET’s version of the same operation.
The Ink information collected in the Ink object attached to the InkCollector also provides access to a very powerful feature: Ink recognition. The following C# code snippet shows how to turn handwriting into regular text:
MessageBox.Show(
    this.collector.Ink.Strokes.ToString());
Here’s the Visual Basic .NET version:
MsgBox(Me.collector.Ink.Strokes.ToString())
It is really as easy as that! Of course, if you wanted to, you could get a lot more information from the recognizer, such as alternate options, confidence levels, and much more. You might also want to recognize shapes or spatial meaning in Ink (such as annotations). Or perhaps you want to perform recognition asynchronously on a background thread. For more information on Ink recognition, see the “Ink Recognition and Ink Analysis” article in this issue.
The Ink object is where all the Ink information is stored. Ink is broken into individual strokes, and each stroke is made up of points. Using this object, developers can manage Ink in memory. For instance, Ink can easily be saved to a file (C#):
byte[] inkBytes = this.collector.Ink.Save();
FileStream strm =
    File.Open(@"c:\test.isf", FileMode.Create);
strm.Write(inkBytes,0,inkBytes.Length);
strm.Close();
Here is the Visual Basic version:
Dim inkBytes As Byte() = Me.collector.Ink.Save()
Dim strm As FileStream = _
    File.Open("c:\test.isf", FileMode.Create)
strm.Write(inkBytes, 0, inkBytes.Length)
strm.Close()
The key line in this code snippet is the one with the Ink.Save() call. Save() automatically serializes all Ink into Ink-serialized format and returns it as a byte array. You can then choose to store that byte array wherever you want, such as in a file (as in this example) or in a database.
Loading Ink is a very similar affair, except for one little gotcha: Ink objects have a Load() method. That method can only load Ink into empty Ink objects reliably. It is therefore important to create a new Ink object and call its Load() method, rather than calling the same method on an existing object. Here is a working example in C#:
FileStream strm = File.OpenRead(@"C:\test.isf");
FileInfo info = new FileInfo(@"C:\test.isf");
byte[] inkBytes = new byte[info.Length];
strm.Read(inkBytes,0,(int)info.Length);
strm.Close();

Ink newInk = new Ink();
newInk.Load(inkBytes);
this.collector.Enabled = false;
this.collector.Ink = newInk;
this.collector.Enabled = true;
And the Visual Basic .NET version:
Dim strm As FileStream = _
    File.OpenRead("C:\test.isf")
Dim info As FileInfo = New FileInfo("C:\test.isf")
Dim inkBytes(info.Length) As Byte
strm.Read(inkBytes, 0, info.Length)
strm.Close()

Dim newInk As New Microsoft.Ink.Ink
newInk.Load(inkBytes)
Me.collector.Enabled = False
Me. collector.Ink = newInk
Me.collector.Enabled = True
Note that it is important to disable the collector/overlay before a new Ink object gets attached; otherwise, an error is thrown.
For more information on storing Ink, see the “Ink-Enabled Database Applications” article in this issue.
More Power with the InkOverlay
The second class of interest is the InkOverlay class, which is a specialized version of the InkCollector class. It provides everything the Ink collector provides, plus added functionality, such as selection and manipulation of Ink. You can simply replace all the references to InkCollector in your previous example with InkOverlay and things will work as they did before. And you now have new features available, such as the ability to switch the overlay into selection mode:
this.overlay.EditingMode =
    Microsoft.Ink.InkOverlayEditingMode.Select;
Visual Basic .NET’s version is practically identical:
Me.overlay.EditingMode = _
    Microsoft.Ink.InkOverlayEditingMode.Select
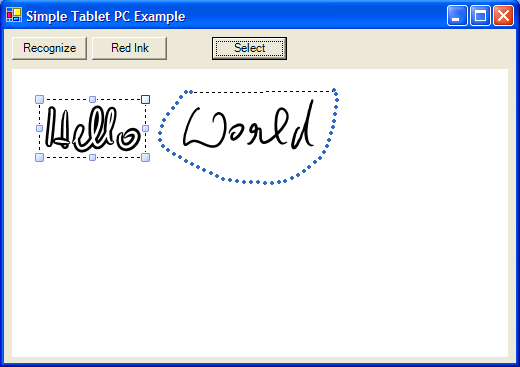
Figure 4 shows an example of the InkOverlay’s selection mode (lasso selection) in action.
Both the InkCollector and InkOverlay classes fire events related to Ink input. For instance, you can use the CursorInRange event to detect whenever the pen is moved within about a quarter of an inch of the display surface (electromagnetic digitizers can detect the pen while it is still in the air). For instance, you can use this event to detect whether the pen tip, or the blunt end of the pen is about to tap on the display and then switch the overlay class into edit or erase mode. To handle this event in C#, you need to wire up an event handler:
this.overlay.CursorInRange +=
    new InkCollectorCursorInRangeEventHandler(
    overlay_CursorInRange);
Then, you need to write the code that handles the event:
private void overlay_CursorInRange(object sender,
    InkCollectorCursorInRangeEventArgs e)
{
    if (e.Cursor.Inverted)
    {
        this.overlay.EditingMode =
            InkOverlayEditingMode.Delete;
    }
    else
    {
        this.overlay.EditingMode =
            InkOverlayEditingMode.Ink;
    }
}
In Visual Basic, you need to make sure that the overlay is defined using WithEvents:
Private WithEvents overlay _
    As Microsoft.Ink.InkOverlay
You can then handle the event in the following fashion:
Private Sub overlay_CursorInRange( _
    ByVal sender As Object, ByVal e _
    As InkCollectorCursorInRangeEventArgs) _
    Handles overlay.CursorInRange

    If e.Cursor.Inverted Then
        Me.overlay.EditingMode = _
            InkOverlayEditingMode.Delete
    Else
        Me.overlay.EditingMode = _
            InkOverlayEditingMode.Ink
    End If
End Sub
This implements end-of-pen erasing. Of course, you can also use the same event for a number of other purposes. Make sure to explore some of the other available events.
Other Ink Alternatives
InkCollector and InkOverlay objects gather pen input information and interpret it as Ink or gestures. Sometimes you do not want to collect Ink at all and you want to interpret pen data in a different fashion. Or perhaps it is necessary to manipulate pen data before it gets interpreted as Ink. Maybe performance is of utmost importance, or maybe you want to implement an unusual way to render Ink in real time. In those scenarios, an API known as the Real Time Stylus API is the way to go. The “Get Control and Performance with the Real Time Stylus API” article in this issue provides in-depth coverage of the subject.
The InkOverlay is a powerful version of the InkCollector.
In Windows Vista (the next version of Windows), Ink support is moved into the core operating system. The new WPF (Windows Presentation Foundation formerly known as Avalon) UI technology supports Ink natively on all versions of Windows. The magic object to look for here is known as InkCanvas. The “Into the Future” article in this issue provides a preview of this technology.
Conclusion
Tablet PC development is much simpler than most developers who have not been exposed to this environment might expect. There are lots of opportunities and areas that provide a lot of functionality for those who are interested. Taking advantage of those features is what this special CoDe Focus issue is all about.
