In my previous article in the July/August 2023 issue of CODE Magazine, I gave you an introduction to OpenAI services. One of the topics I discussed was how to use LangChain to build an LLM-based application. LangChain is a framework designed to simplify the creation of applications using Large Language Models. It “chains” together various components to create compelling AI applications that can query vast amounts of up-to-date data.
LangChain is a framework designed to simplify the creation of applications using Large Language Models. It “chains” together various components to create compelling AI applications that can query vast amounts of up-to-date data.
To the novice, LangChain can be quite overwhelming and overly complex. And unless you are a developer, LangChain remains largely out of reach to most people - until Flowise.
Flowise is a low-code/no code drag-and-drop tool that makes it easy for people (programmers and non-programmers alike) to visualize and build LLM apps. Instead of writing code using the LangChain framework, you can just drag-and-drop components (known as nodes in Flowise) and connect them. I find it very useful to get started, and as I explore deeper, it makes me appreciate LangChain even more.
In this article, I'll walk you through some of the key features of Flowise. In particular, you'll build a number of fun apps, including how to build chatbots that works like ChatGPT, an app that queries your own data, and an app that's able to analyze your CSV data files. Without further delay, let's go!
Installing Flowise Locally
There are a couple of ways to get Flowise up and running. Let's go through the first method to install Flowise on your machine. As Flowise is built using Node.js, you need to first install Node.js.
Prerequisites: Installing Node.js
The easiest way to install Node.js is to install nvm (Node Version Manager) first. nvm is a tool for managing different versions of Node.js. It:
- Helps you manage and switch between different Node.js versions with ease.
- Provides a command line where you can install different versions with a single command, set a default, switch between them and more.
For macOS, type the following command in Terminal to install nvm:
$ curl -o-
https://raw.githubusercontent.com/
nvm-sh/nvm/v0.39.2/install.sh | bash
You can also get the above command from https://github.com/creationix/nvm, where you can find the command to install the latest version of nvm.
Once the installation is done, type the following command in Terminal:
$ nano ~/.zshrc
Append the following lines to the .zshrc file and save it:
# put this in one line
export NVM_DIR="$([ -z "${XDG_CONFIG_HOME-}" ] &&
  printf %s "${HOME}/.nvm" || printf %s "${XDG_CONFIG_HOME}/nvm")"
# put this in one line
[ -s "$NVM_DIR/nvm.sh" ] && \. "$NVM_DIR/nvm.sh"
Restart Terminal.
For Windows, download the latest nvm-setup.exe file from https://github.com/coreybutler/nvm-windows/releases. Then, double-click the nvm-setup.exe file and install nvm in C:\nvm and nodejs in C:\Program Files\nodejs.
It's important that the installation path for nvm have no spaces or else you'll have problems using nvm later on.
Once nvm is installed, you can install Node.js. To install the latest version of Node.js, use the following command:
$ nvm install node
To use the latest version of Node.js, use the following command:
$ nvm use node
Installing Flowise
To install Flowise, you can use npm (Node Package Manager), a tool that comes with Node.js. Type the following command in Terminal to install Flowise using npm:
$ npm install -g flowise
Once the installation is done, you can now start up Flowise using the following command:
$ npx flowise start
Installing Flowise Using Docker
The second method to install Flowise is to use Docker. For this, I'm going to assume that you already have Docker installed and that you have some basic knowledge of it. If you are new to Docker, refer to my article Introduction to Containerization Using Docker in the March/April 2021 issue of CODE Magazine.
In Terminal (or Command Prompt), create a new directory and change into this new directory:
$ mkdir flowise
# cd flowise
Create a file named Dockerfile and populate it with the content, as shown in Listing 1.
Listing 1: Content of Dockerfile
FROM node:18-alpine

USER root

RUN apk add --no-cache git
RUN apk add --no-cache python3 py3-pip make g++
# needed for pdfjs-dist
RUN apk add --no-cache build-base cairo-dev pango-dev

# Install Chromium
RUN apk add --no-cache chromium

ENV PUPPETEER_SKIP_DOWNLOAD=true
ENV PUPPETEER_EXECUTABLE_PATH=/usr/bin/chromium-browser

# You can install a specific version like:
#   flowise@1.0.0
RUN npm install -g flowise

WORKDIR /data

CMD ["flowise","start"]
The Dockerfile contains the instructions to build a Docker image.
Next, type the following command to build a Docker image named flowise:
$ docker build --no-cache -t flowise .
You can now use the newly built flowise Docker image to create and run a Docker container (also named flowise; as specified using the –name option):
$ docker run -d --name flowise -p 3000:3000 flowise
The Flowise app internally listens on port 3000. The usage of the -p option in the Docker command signifies that the Docker container will be configured to listen on port 3000 externally (the first 3000 in 3000:3000) and forward that traffic to port 3000 internally, aligning with the port where Flowise is actively listening.
Launching Flowise
Now that Flowise is installed and running (either locally using Node.js or using Docker), you can load Flowise using a web browser. Type http://localhost:3000/ in the URL bar and you should see Flowise, as shown in Figure 1.
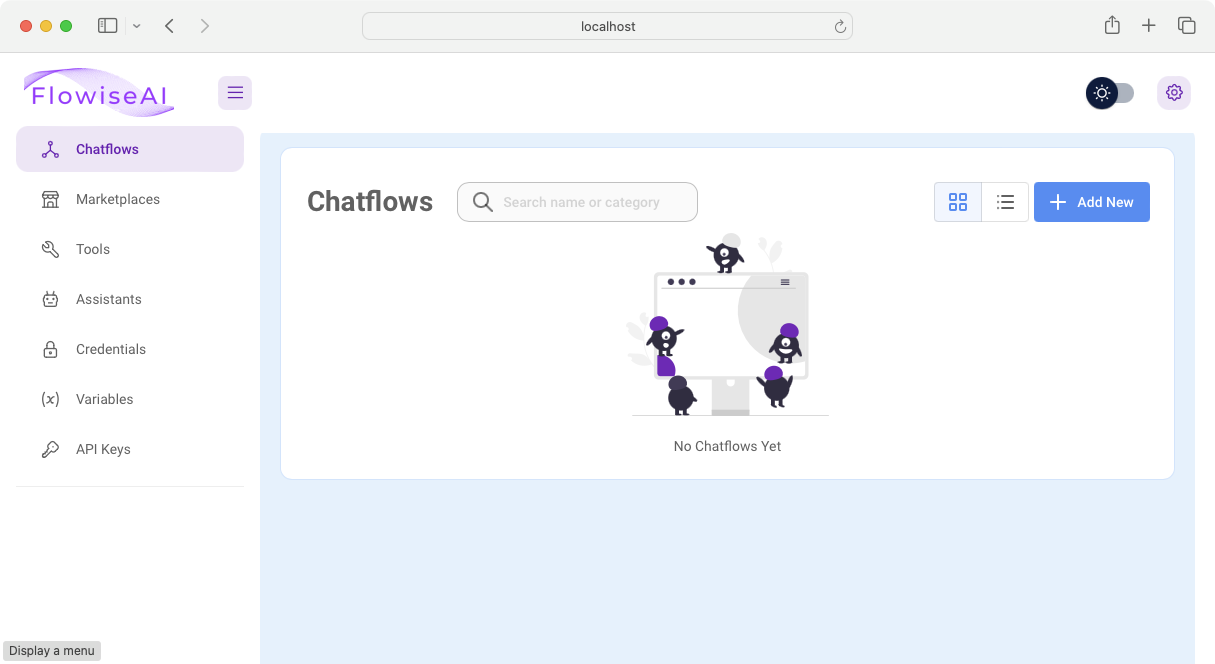
Creating a Simple Language Translator
Click the Add New button to create a new Flowise project. You should now see the canvas for your new project (see Figure 2).
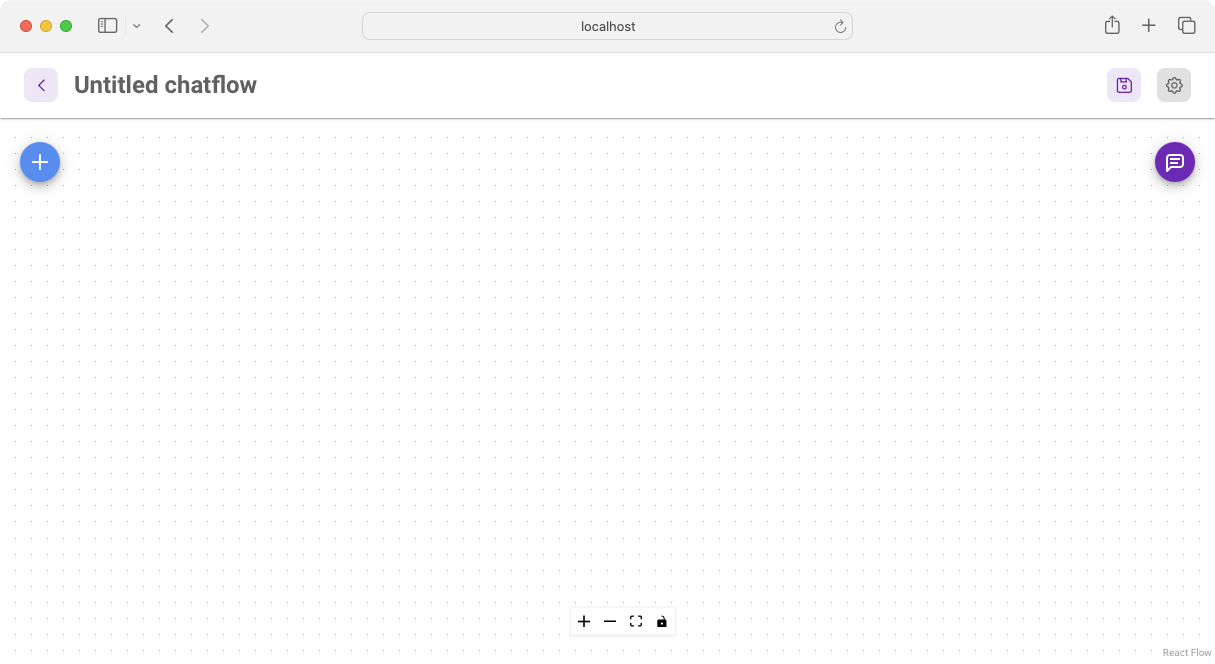
Adding Nodes
To build your LLM-based applications, you add nodes to the project. Nodes are the building blocks of your Flowise application.
The various nodes in Flowise map to corresponding components in LangChain.
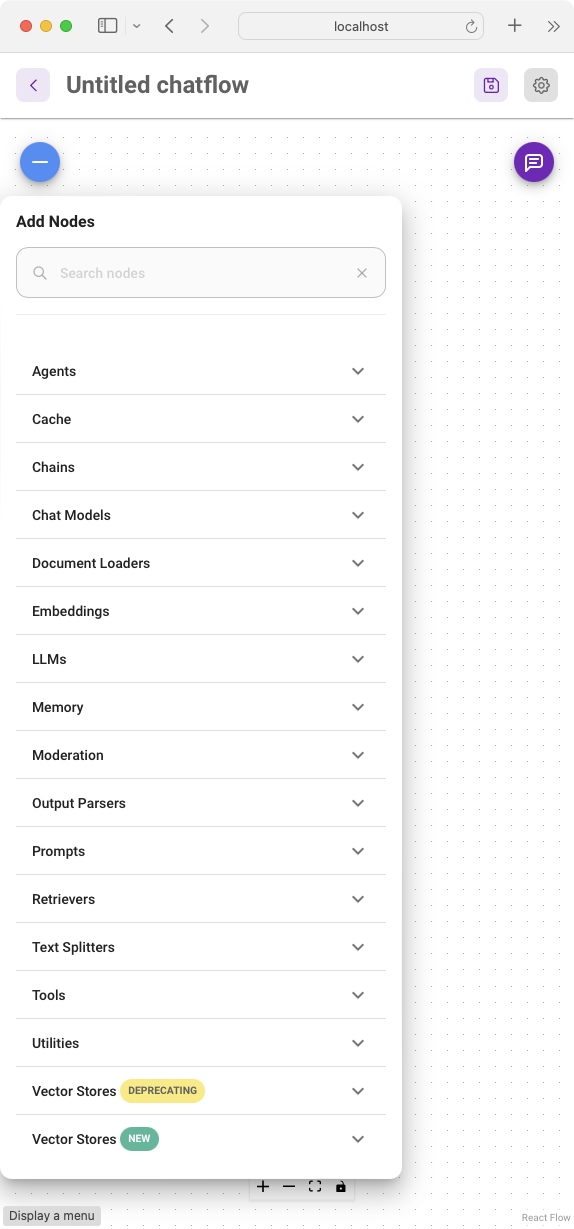
To add a node to the canvas, click the + button to display all the available nodes. All of the available nodes are organized into groups, such as Agents, Cache, Chains, Chat Models, etc. (see Figure 3). You can expand each of these groups to view the various nodes.
For this project, let's start off with a straight-forward task. Let's build a language translator that translates whatever the user types in into Chinese as well as Japanese.
The first node to add is the OpenAI node (located under the LLMs group). Drag and drop the OpenAI node onto the canvas (see Figure 4). You'll make use of the gpt-3.5-turbo-instruct LLM provided by OpenAI.
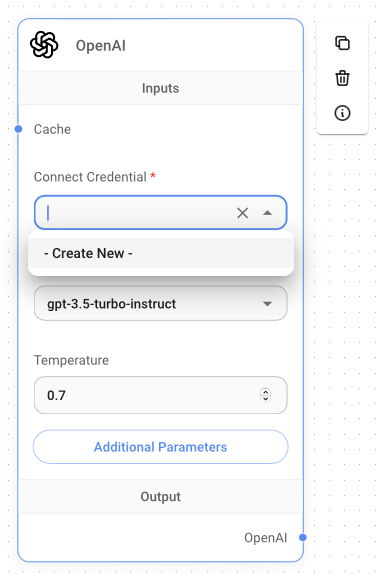
To make use of the LLM at OpenAI, you need to have an OpenAI API key. Take note that you will be charged based on your usage.
You can apply for an OpenAI API key at: https://platform.openai.com/account/api-keys. Note that this is a chargeable service.
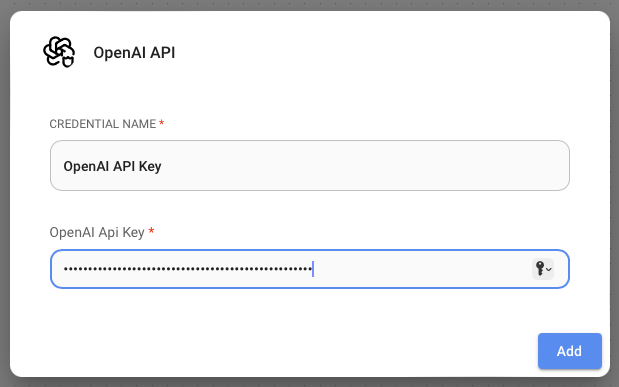
Under the Connect Credential section of the OpenAI node, click the drop-down button and select Create New. Give your credential a name and type in your OpenAI API key (see Figure 5). Then click Add.
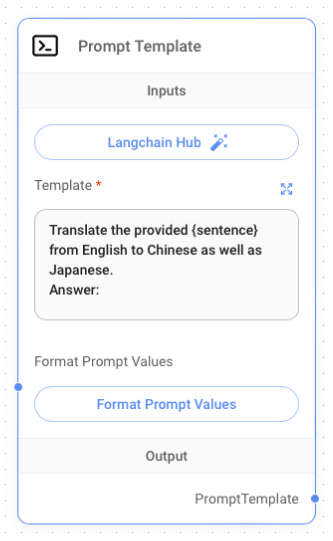
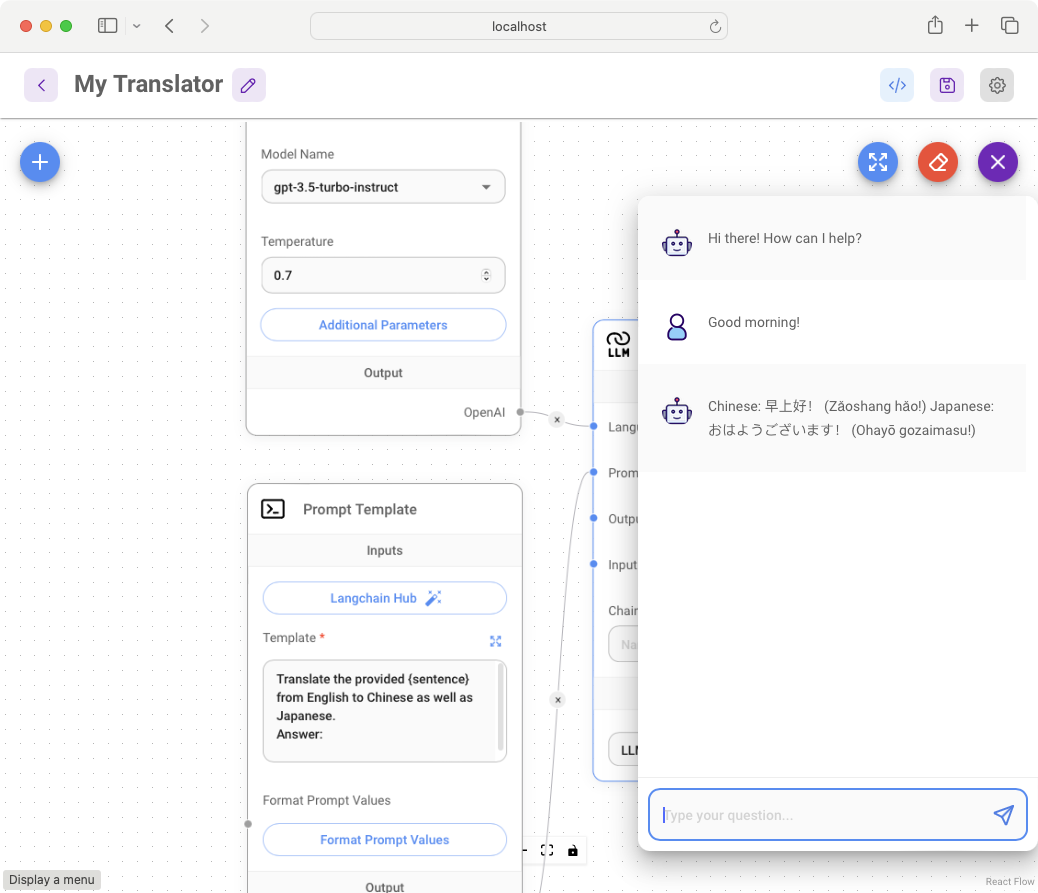
Next, you're going to add the Prompt Template node (located under the Prompts group). You'll create the prompt to instruct the LLM to perform the translation from English to Chinese and Japanese. Type the following sentences into the Template textbox (see Figure 6).
Translate the provided {sentence} from
English to Chinese as well as Japanese.
Answer:
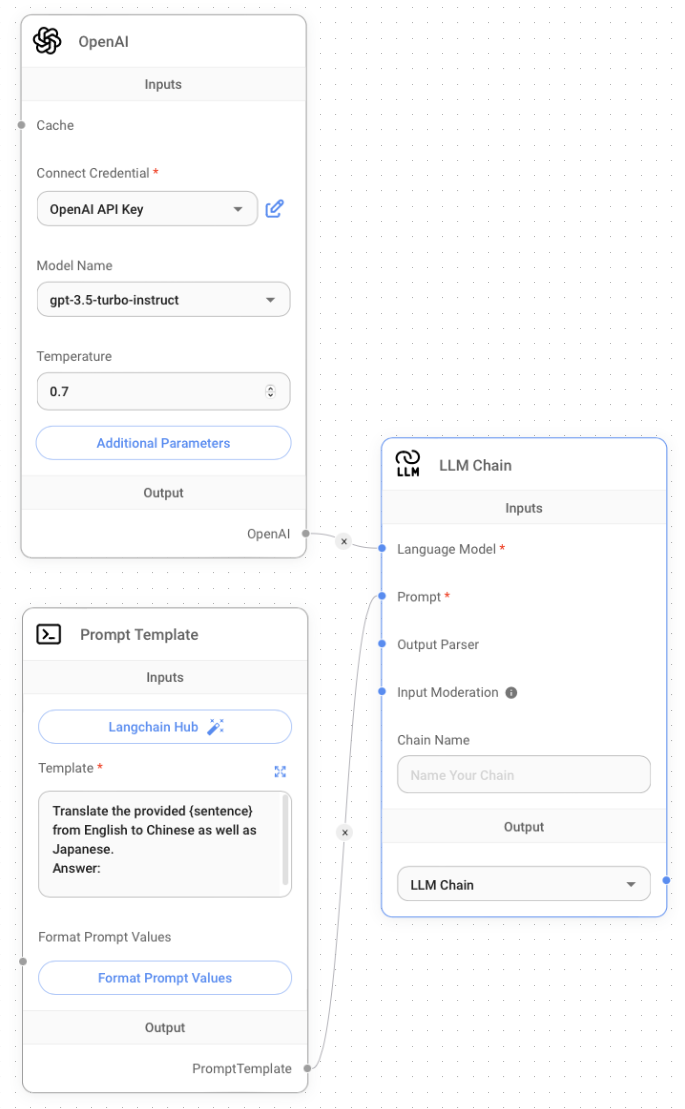
The third and final node you need to add is the LLM Chain node (located under the Chains group). This node takes in an LLM as well as a prompt template (as well as some other optional nodes). Connect the three nodes that you've added, as shown in Figure 7.
Testing the Project
You're now ready to test the project. At the top right corner of the page, there are several buttons (see Figure 8).
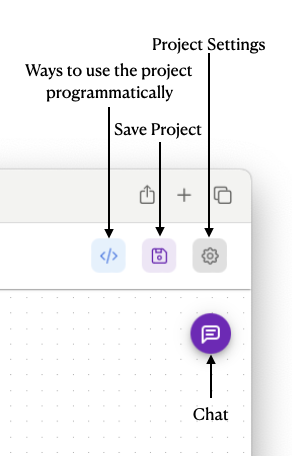
To run the project, you first need to click the Save Project button to save the project. When prompted, name the project My Translator. Then, click the Chat button to bring up the chat window. Figure 9 shows the response returned by the OpenAI LLM after you typed Good morning! The response returned is the sentence translated into Chinese and Japanese.
Downloading the Project
Once the project is saved, you can download a copy so that you can:
- Load it back to Flowise later on.
- Programmatically call your Flowise project using languages such as Python or JavaScript.
To download the Flowise project, click on the Project Settings button and click Export Chatflow (see Figure 10).
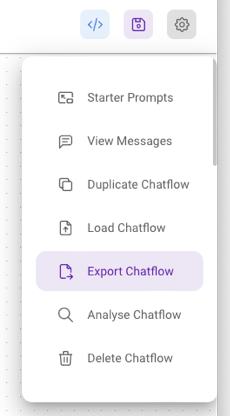
For this project, a JSON file named My Translator Chatflow.json is downloaded onto the local computer.
Using the Flowise Project Programmatically
With the project downloaded, you can now make use of it programmatically. Flowise provides a number of ways to call your project programmatically. Click on the button labelled </> and you'll see the list of options shown in Figure 11.
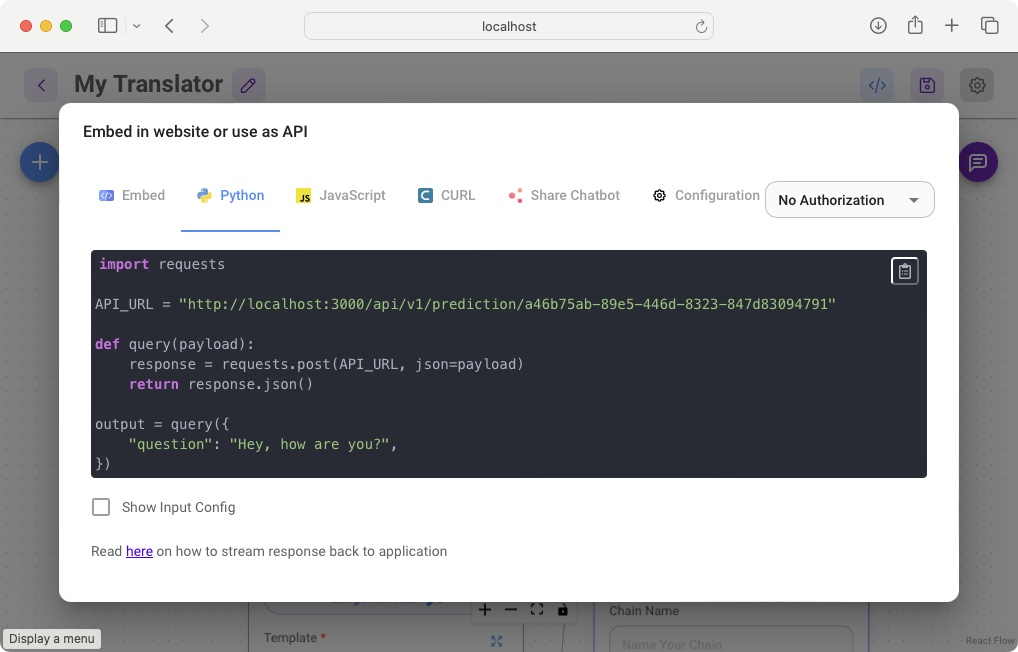
You can:
- Embed your project in a HTML web page.
- Embed your project in a React web application.
- Call your project as a web service using Python or JavaScript.
- Call your project as a web service using the CURL utility on the command line.
- Share your project as a chatbot web application.
Let's take a look at some examples. For accessing the project as a web service using Python, you can use the following code snippet:
import requests
API_URL = "http://localhost:3000/api/" +
          "v1/prediction/a46b75ab-89e5"+
          "-446d-8323-847d83094791"
def query(payload):
    response = requests.post(API_URL, json=payload)
    return response.json()

output = query({"question": "Hey, how are you?",})
print(output)
The result returned will look like this (formatted for clarity):
{
  'text':
     '\nChinese: 嘿,你好吗?
      \nJapanese: こんにちは、お元気ですか?'
}
For accessing the project on the command line, you can use the CURL utility:
$ curl http://localhost:3000/api/v1/
prediction/a46b75ab-89e5-446d-8323-847d83094791 \
  -X POST \
  -d '{"question": "Hey, how are you?"}' \
  -H "Content-Type: application/json"
The result returned will look like this:
{"text":"\nChinese: 嘿,你好吗?
\nJapanese: こんにちは、お元気ですか?"}
You can also share the chatbot with other users. To do that, click on the Share Chatbot tab and copy the URL (see Figure 12).
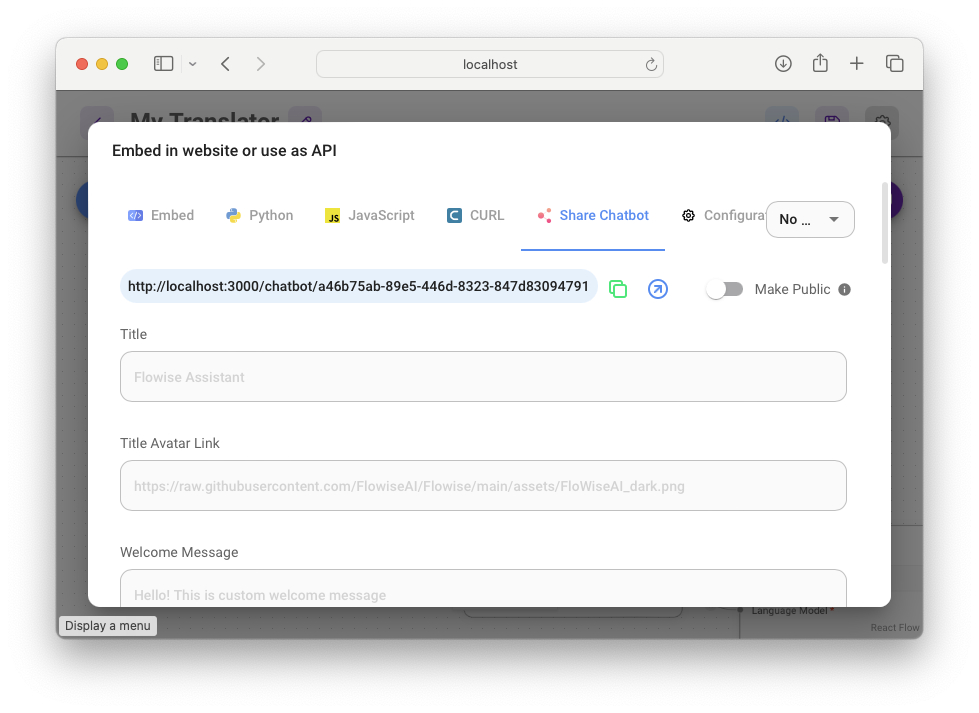
When you paste the copied URL into a web browser, you'll be prompted to enter a username and password. By default, Flowise is started without authorization protection. You can enter anything for username and password and you'll be allowed accessed to the chatbot. If you want to bypass the prompting for username and password, check the Make Public option, as shown in Figure 12.
You can set a username and password in Flowise by following the instructions on this page: https://docs.flowiseai.com/configuration/authorization/app-level.
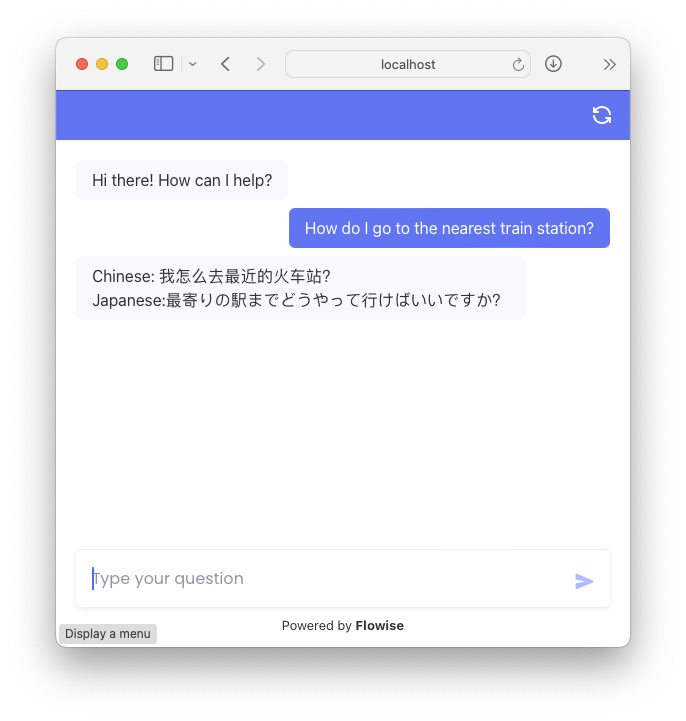
You can now see the chatbot. This provides a convenient way for users to make use of your project straight away (see Figure 13).
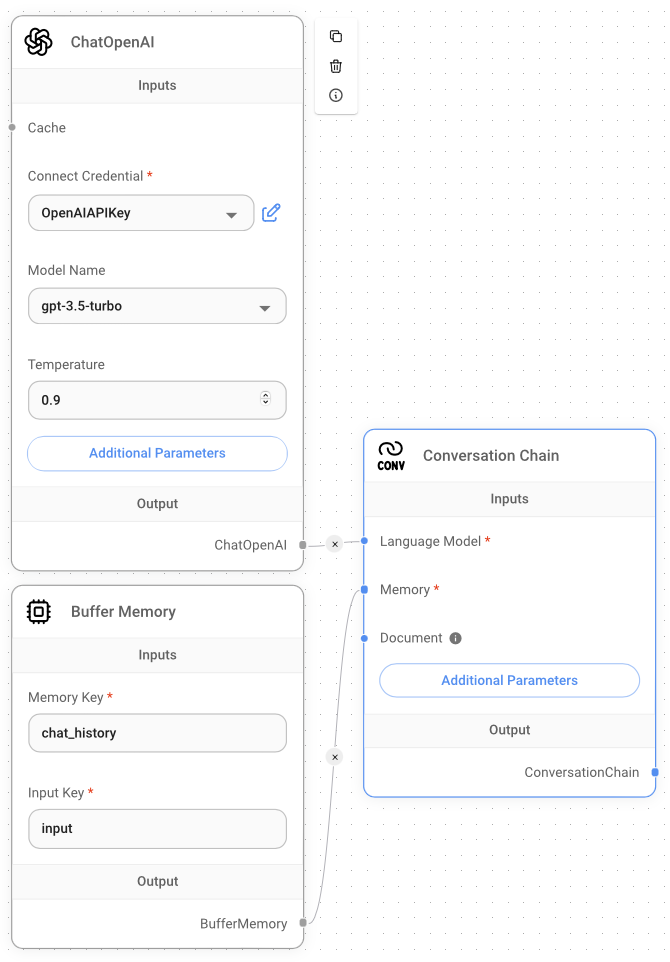
Creating a Conversational Chatbot
The second project to create is a conversational chatbot. Using Flowise, you can create a chatbot that functions very much like ChatGPT. Here are the nodes that you'll be using for this project:
- ChatOpenAI: You use this node to specify the model you want to use from OpenAI. Also, you need to specify your OpenAI API key, so take note that you will be charged based on your usage. For this example, you'll use the gpt-3.5-turbo model.
- Buffer Memory: The memory to remember your conversation.
- Conversation Chain: A conversation chain that takes in a LLM and memory with the prompt template already configured for chatting.
Figure 14 shows how the nodes are connected. Note that for this example, the inferencing (running of the LLM) is performed by OpenAI.
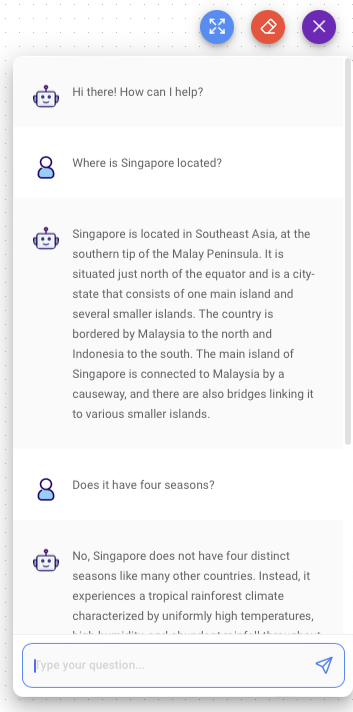
Save the project and then click the Chat button. You can chat with the OpenAI LLM and follow up with questions (see Figure 15). As the conversation chain is connected to the buffer memory, you can maintain a conversation with the LLM.
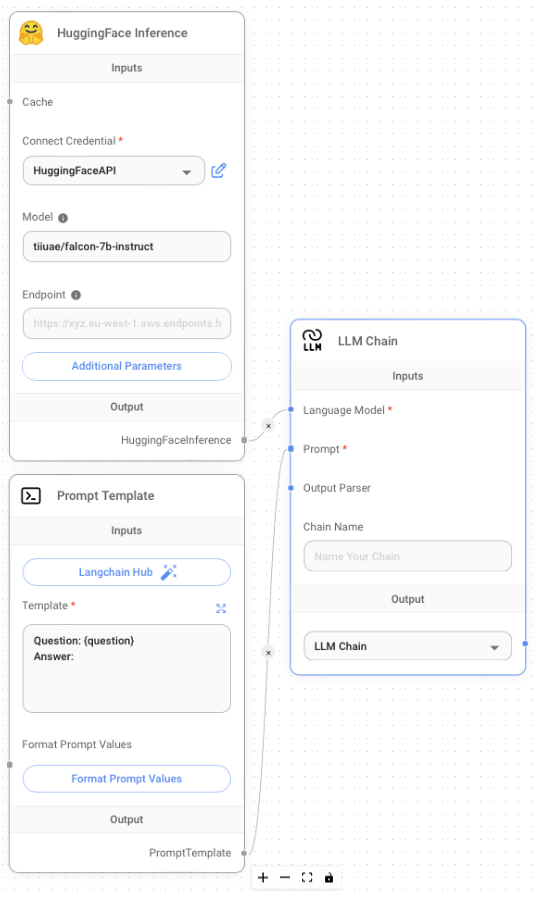
Alternatively, if you want to build a chat application without paying for the LLM (as in the case of OpenAI), you can use the HuggingFace Inference node. Figure 16 shows how you can do that using the following nodes:
- HuggingFace Inference: Use this node to make use of a LLM hosted by HuggingFace. You need to specify your HuggingFace Token key.
- Prompt Template: Configures the prompt template.
- LLM Chain: Connects to the LLM and prompt template.
Note that for the HuggingFace Inference node, there are two ways to use the model:
- If you specify the model name, tiiuae/falcon-7b-instruct in this example, the model will be downloaded to your computer and run locally. If you try to use a model that's too large, such as mistralai/Mixtral-8x7B-v0.1, you may get an error, as shown in Figure 17.
- To use a larger LLM (such as mistralai/Mixtral-8x7B-v0.1), you need to use HuggingFace Inference Endpoints, which runs the model on the cloud (by HuggingFace).
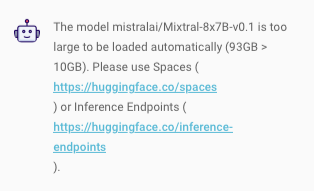
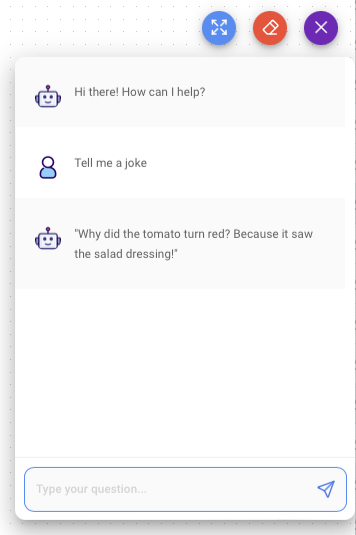
Figure 18 shows the chatbot using the tiiuae/falcon-7b-instruct model.
Querying Local Documents
Chatting with an LLM is fun, but in the real world, businesses are more interested in whether they are able to make use of AI to query their own data. Well, using a technique known as vector embedding, you're now able to do just that.
Vector embedding, also known as word embedding or vector representation, is a technique used in natural language processing (NLP) and machine learning to represent words or phrases as numerical vectors. The idea behind vector embedding is to capture the semantic relationships and contextual information of words in a continuous vector space.
In this section, you'll build an application that allows you to query your own PDF document. You'll need the following nodes:
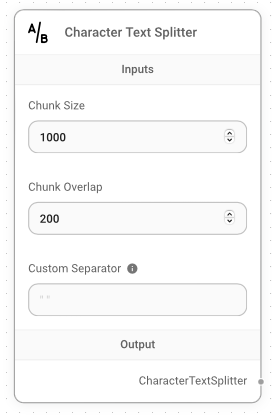
- Character Text Splitter: Use this node to split a long document into smaller chunks that can fit into your model's context window.
- PDF File: Loads a PDF document for processing.
- HuggingFace Interface Embeddings: Use this node to perform embedding. Embedding refers to the representation of words or sentences as vectors in a high-dimensional space. It's a way to represent words and sentences in a numerical manner. Note that in this example, you can also make use of the OpenAI Embeddings node, but this will incur charges. In contrast, the HuggingFace Interface Embeddings node uses the embedding model from Hugging Face, which is free.
- In-Memory Vector Store: Use this node to store embeddings in-memory and it performs an exact, linear search for the most similar embeddings.
- OpenAI: Use this node to make use of an LLM from OpenAI to perform querying of your local data.
- Conversational Retrieval QA Chain: Use this node to create a retrieval-based question answering chain that is designed to handle conversational context.
You'll learn how to add each of the above nodes and connect them in the following steps.
First, add the Character Text Splitter node and configure it as shown in Figure 19.
Then, add the Pdf File node to the canvas as shown in Figure 20. To upload a local PDF document for querying, click the Upload File button and select the PDF document that you want to use. Then, connect the Character Text Splitter node to the Pdf File node.
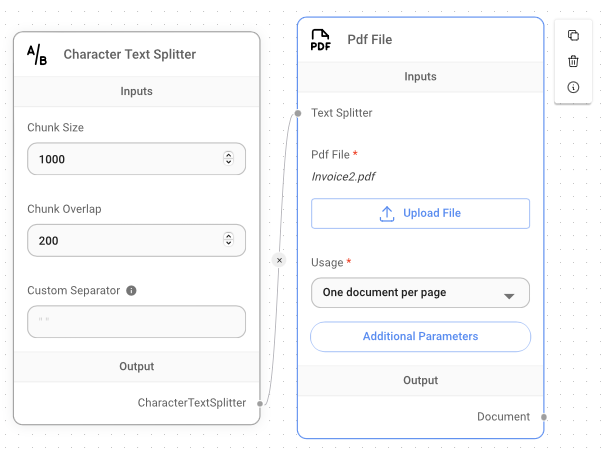
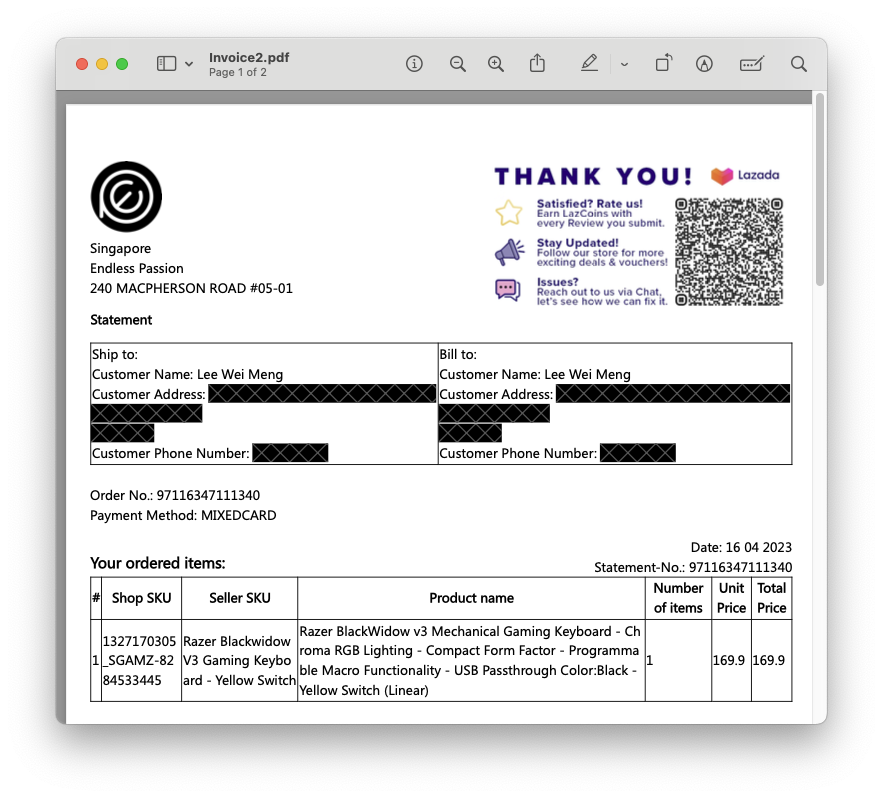
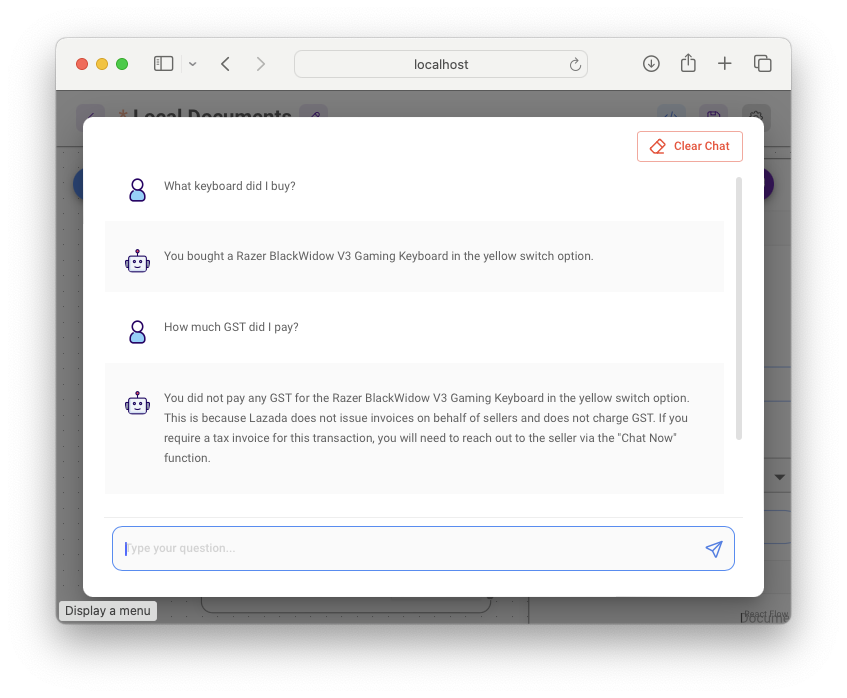
Figure 21 shows the content of the PDF document that contains the online purchase of an item.
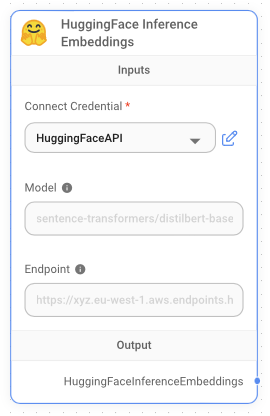
Next, add the HuggingFace Interface Embeddings node to the canvas and enter your Hugging Face API token (see Figure 22).
You can obtain a Hugging Face API Token from https://huggingface.co/settings/tokens.
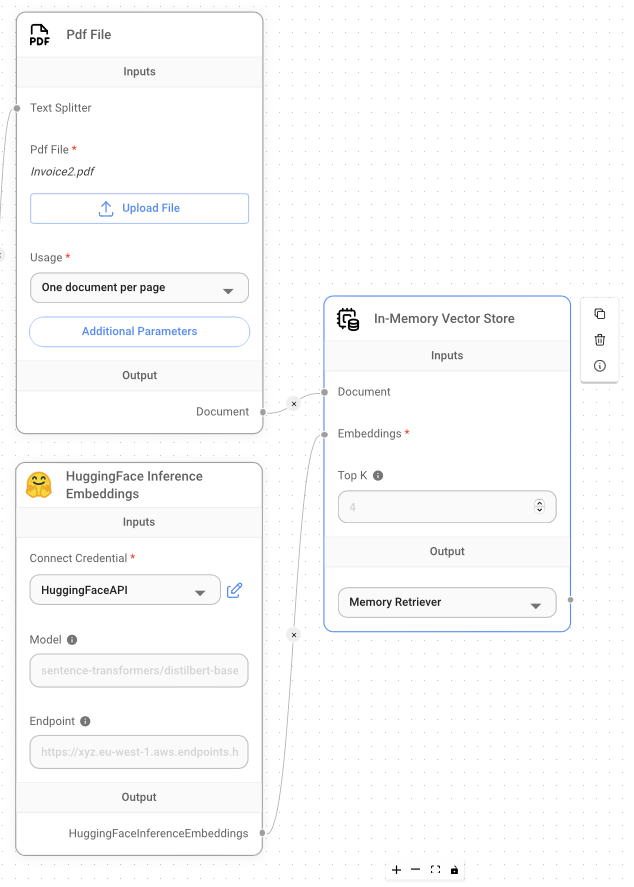
The next node to add is In-Memory Vector Store. Add this node to the canvas and connect it to the Pdf File and HuggingFace Inference Embeddings nodes as shown in Figure 23.
Next, drag and drop the OpenAI node and set your OpenAI API key. Finally, add the Conversational Retrieval QA Chain node and connect it to the other nodes as shown in Figure 24.
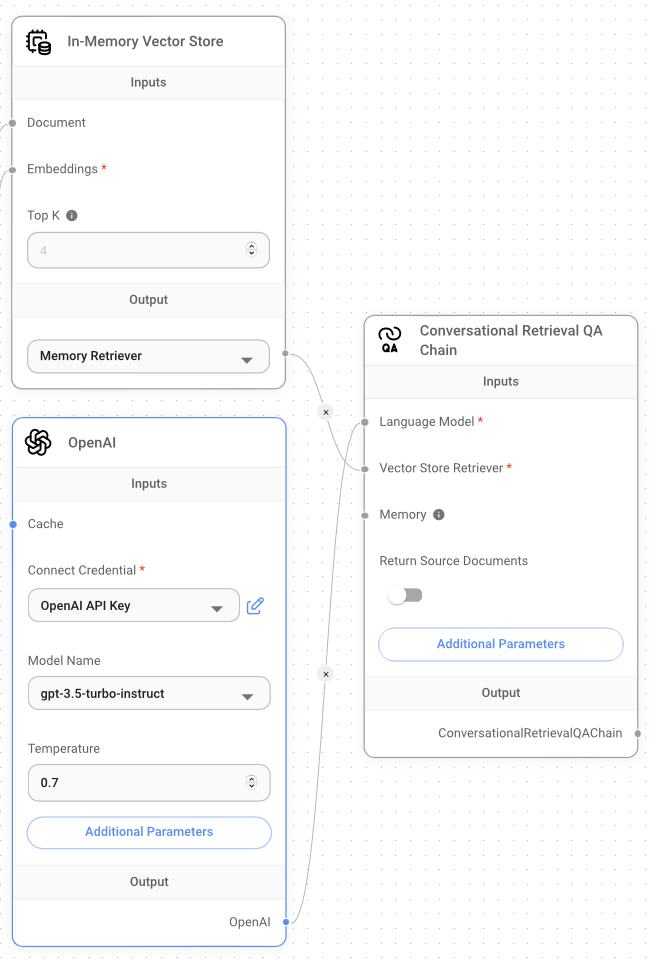
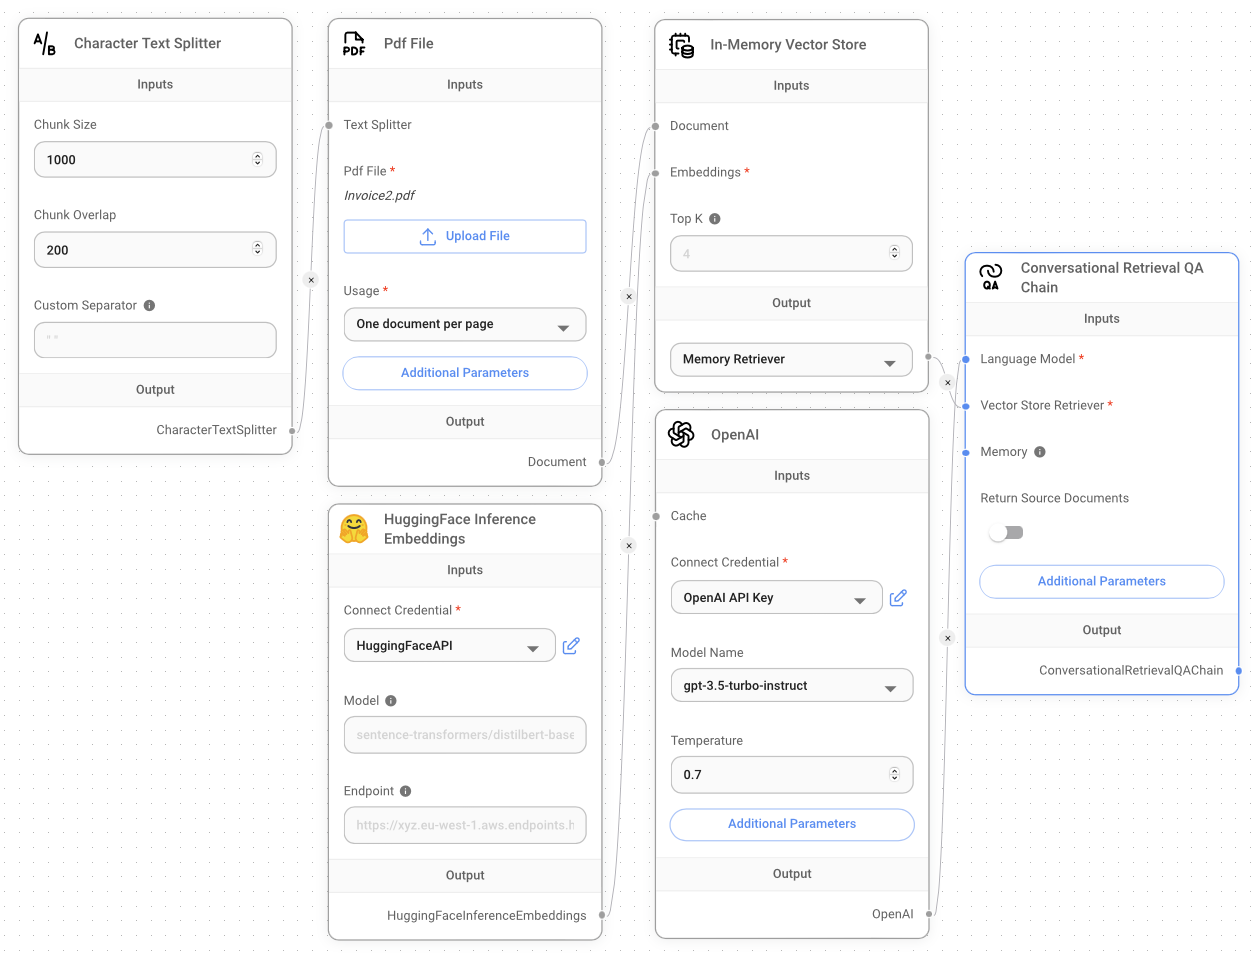
The complete project is shown in Figure 25.
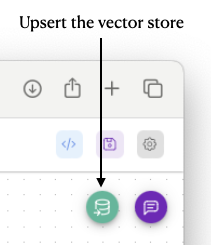
Before you can run the project, you need to click the Upsert button, as shown in Figure 26.
You'll see the popup, as shown in Figure 27.
The term upsert refers to an operation that inserts rows into a database table if they don't already exist, or updates them if they do.
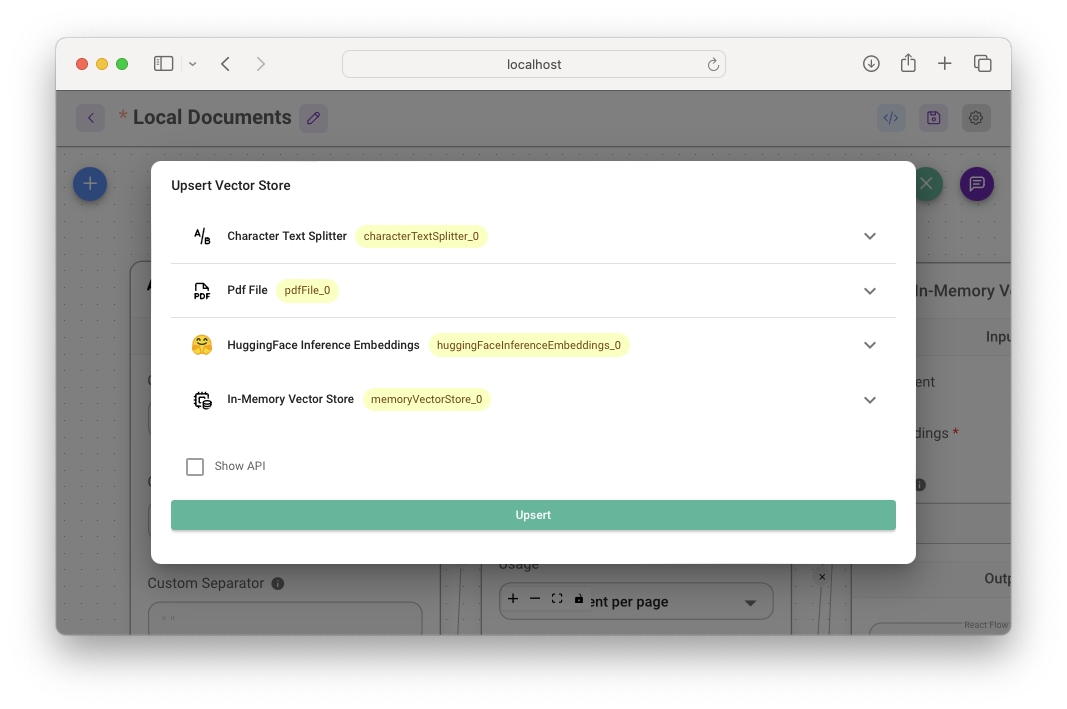
Clicking the Upsert button performs a few operations: text splitting on the PDF document, creating embeddings using the HuggingFace Inference Embeddings, and then storing the vectors in-memory.
Once the upsert is done, you can now click on the Chat button to start the chatbot (see Figure 28).
Using Agents for Analyzing Data
LLMs are designed primarily for generating responses related to natural language understanding. Nevertheless, they exhibit notable limitations when faced with analytical inquiries. For example, when presented with a CSV file and asked for a summary of its contents, LLMs often demonstrate limited capabilities in providing a satisfactory answer. To use LLMs for analytical tasks, a common approach involves employing the LLM to generate the necessary code for the query and subsequently executing the code independently.
In LangChain, there is a feature known as agents. An agent is a system that decides what action is to be taken by the LLM, and it tries to solve the problem until it reaches the correct answer. Agents are designed to perform well-defined tasks, such as answering questions, generating text, translating languages, summarizing text, etc.
In short, an agent helps you accomplish your tasks without you needing to worry about the details.
For this section, I want to show how you can make use of the CSV Agent in LangChain (and in Flowise) to perform analytical tasks on a CSV file. The CSV Agent node operates by reading a CSV file in the background. It employs the Pandas DataFrame library and uses the Python language to execute Python query code generated by an LLM.
For the CSV file, I'll be using the Titanic training dataset (Source of Data: https://www.kaggle.com/datasets/tedllh/titanic-train. Licensing - Database Contents License (DbCL) v1.0 https://opendatacommons.org/licenses/dbcl/1-0/).
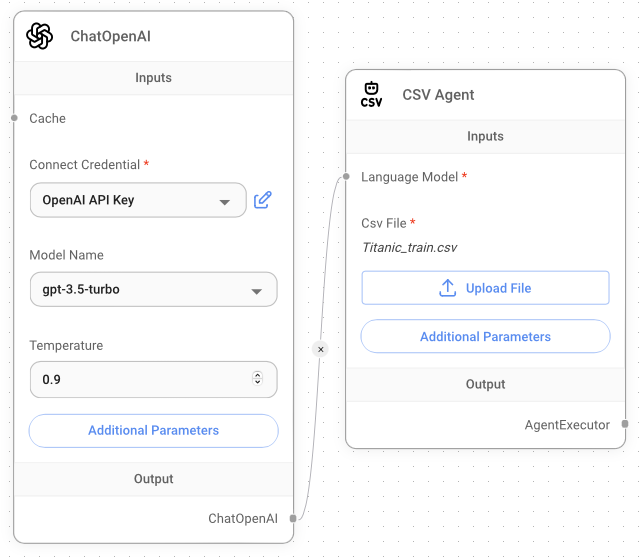
Let's create a new Flowise project and add the following components to the canvas:
- ChatOpenAI: Remember to enter your OpenAI API key.
- CSV Agent: Click on the Upload File button to select the Titanic CSV file
Titanic_train.csv.
Figure 29 shows how the nodes are connected.
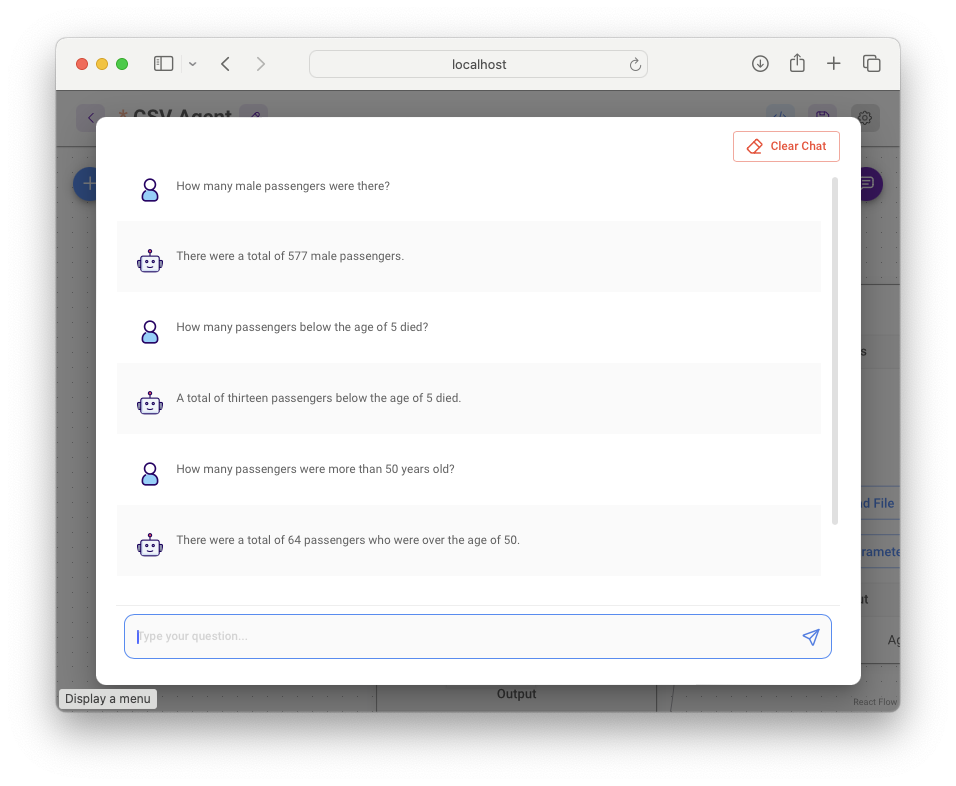
Save the project and then click the Chat button to display the chatbot (see Figure 30). You can now ask analytical questions pertaining to the CSV file, such as:
- How many male passengers were there?
- How many passengers below the age of five died?
- How many passengers were more than 50 years old?
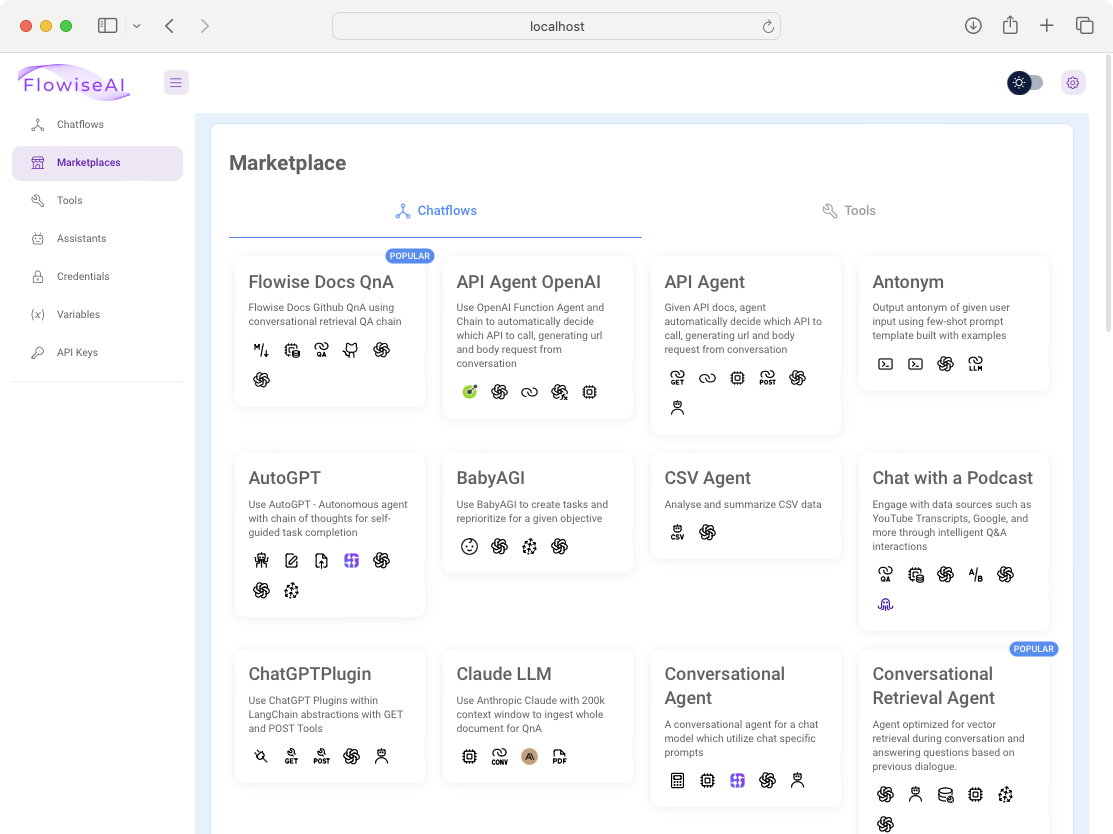
Summary
I hope this article provides motivation for you to get started with LangChain programming. Although LangChain programming can be intimidating, Flowise takes away the fear and provides a low-code/no-code experience for you to get started with AI programming. One more thing: If you want to learn more about the capabilities of Flowise, the fastest way is to learn from the templates provided. Figure 31 shows the Marketplaces in Flowise where you can get the templates for popular applications that you can build with Flowise. Good luck and have fun!