


In a previous article in CODE Magazine, I talked about FIDO2 and WebAuthn. Look, passwords suck, but finally, as an industry, we're getting behind getting rid of them for real. The FIDO2 standard bakes in enough capabilities to completely eliminate passwords, and passkeys offer the convenience to be a great password replacement.
Yes, password stealing is going to be history and along with it, things such as phishing. This safety will gradually be so completely built across the internet that our grandmothers will feel comfortable using it. Of course, security is a game of cat and mouse. The threats will just move elsewhere, like hacking into back-end systems, social engineering, etc.
That is not what this article is about. This article is about implementing passkey authentication in your web applications. I ended the previous article by showing how to use hardware-based FIDO2 keys, such as YubiKeys to authenticate with Microsoft Entra ID (formerly Azure AD). Although that's a perfectly capable option, what if you're not using Entra ID? Or what if you truly wish to understand what's going on behind the scenes?
In this article, I'm going to build an end-to-end application that shows how to implement FIDO2 authentication both on the client side and server side. I'll use that as an excuse to explain the various details in the spec, and I'll use it to demonstrate passkeys.
Assumptions
The FIDO2 standard is quite flexible. It considers various nuances, such as the quality of keys you wish to control, how many credentials a user can create for a certain URL, what kinds of passkeys are supported, etc. Although I won't have the opportunity to demonstrate every single possibility in this article, for brevity and the sake of having a complete application working by the end of this article, let's start with some assumptions.
This article is going to show demo code. This code is not intended for production use. There are security shortcuts in the code I'm about to demonstrate.
Although the FIDO2 standard allows a user to create multiple credentials for the same website, I'm going to restrict my application to using a single credential for the given website. I'll talk through what multiple credentials means for a user and the facilities WebAuthn allows that help a user pick a certain credential or allows your application to specify which explicit credential is acceptable for a given purpose.
FIDO2 allows you to create credentials for a given URL as long as your website runs on HTTPS. For development purposes, you can also use localhost without HTTPS, and that's what I'll be using.
To keep things simple, I'm going to use session state as my database. Again, this is a huge shortcut I'm taking, and this is, by no means, a production-ready application. In reality, you'd use a persistent storage, such as a database, to maintain user registration and log-in information. However, I've taken the shortcut for two reasons. The first reason is brevity of code. The second reason is that anytime I start debugging, my application resets back to zero. This reset means that between runs of the application, I must delete the passkey that the user registered. This is an okay workaround for demo code. Also, the hard-coded user I'll be using is sahil@localhost.com.
Although the FIDO2 protocol and the WebAuthn standard are not language specific, the browser code must be written in JavaScript. The server code can be implemented in any language you wish. There are libraries for various languages that you can use. For my purposes, I'll be using NodeJS.
I won't be focusing on NodeJS basics here.
With these assumptions, let's get started.
Project Set Up
The basic project structure I'm using can be seen in Figure 1.
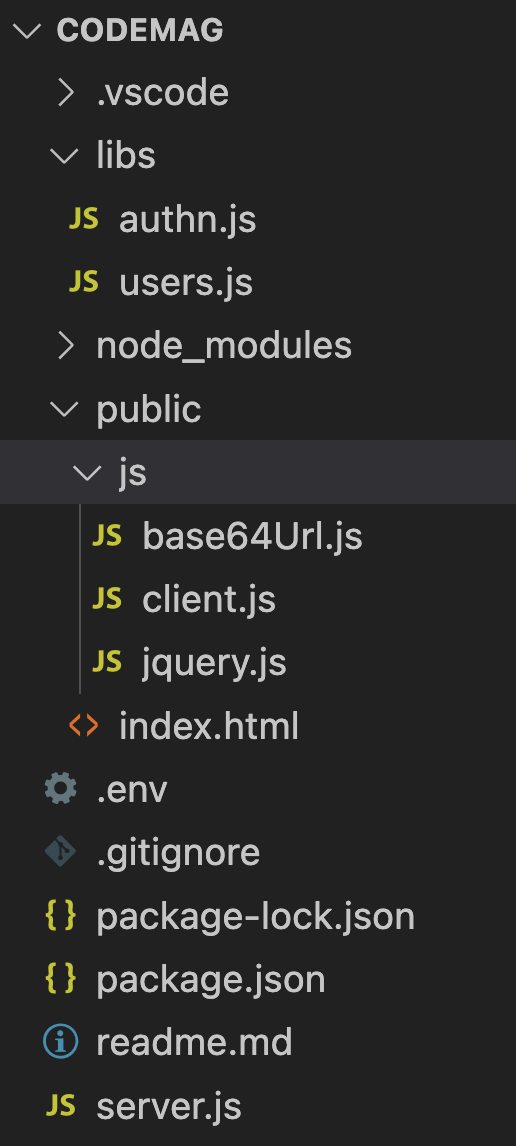
This looks like a simple NodeJS project. This application is built using express and takes a dependency on the following npm packages.
The project uses dotenv to hold environment variables equivalent in the .env file. Dotenv and .env files are a great way of managing configurable inputs to your program. The thought is that you can specify values as a .env file in your local dev environment. When the .env file is missing, it can pick those same values from an environment variable. This is incredibly useful when you package your application and ship it as, say, a Docker container. Typically, you'd create a .env as a sample, check it in, then add it to .gitignore and allow developers to add sensitive information. Or you can create a .env.example in the root of your project. This is a great way to reduce the impedance mismatch between production and dev.
I'm also taking a dependency on express and express-session. These are express-related packages that allow me to create a basic website that supports a simple UI, and some back-end code that supports an API. Also, it allows me to support sessions.
Finally, I'm taking a dependency on “fido2-lib” npm package. Although I could write the FIDO2 code myself, I really don't wish to reinvent the wheel and spend my weekend implementing the well-documented 19-step validation logic when someone else has already done it and it's been peer reviewed and well tested.
The “dependencies” section of my package.json looks like this:
"dependencies": {
  "dotenv": "^16.3.1",
  "express": "^4.18.2",
  "express-session": "^1.17.3",
  "fido2-lib": "^3.4.3"
},
The rest of my package.json is pretty plain vanilla.
In the rest of my project, the .env file holds my environment variables, which can be seen here:
RPDisplayName = "localhost"
RPID = "localhost"
RPOrigin = "http://localhost"
RPPort = "80"
These are all values I need either for the FIDO2 standard or to run my site. For the port I wish to run on, it would be nice if this were configurable. Once referenced in my .env, I can use these values:
const env = dotenv.config().parsed;
console.log(env.RPID);
The rest of my code consists of some server-side and some client-side code. The server-side code is responsible for serving the client-side code as a simple website and exposing certain APIs that are required for the FIDO2 registration and authentication to succeed.
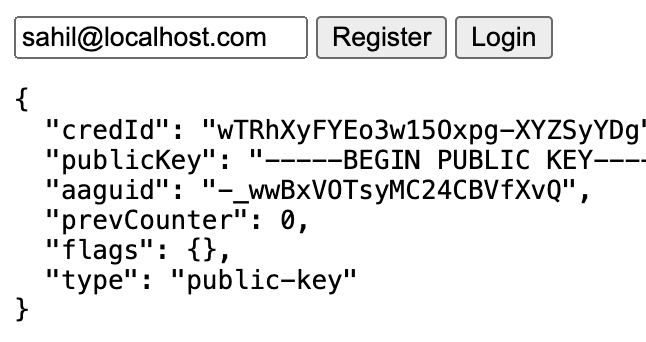
The client-side code presents a very simple user interface where I show the user a text box prompting the user to enter their username, and click the register or login button as needed. Additionally, for debug purposes, I can show the user a status message showing the output of their most recent action. The user interface in action can be seen in Figure 2. I hope you're impressed by my design skills.
The server-side code also exposes four POST methods: beginRegistration, endRegistration, beginLogin, and endLogin. I'll explain each of these in depth shortly. They're implemented in the /libs/authn.js file. A partial snippet of setting up one of these routes can be seen below.
import express from 'express';
router.use(express.json());
router.post('/beginRegistration', async (req, res) => {
..
})
export default router;
The authn.js file also makes use of sessions that are set up as below. Of note, this is completely insecure code. You'd want to use secure sessions in production, and you wouldn't want to save user information in sessions at all. But this is demo code.
import session from 'express-session';
router.use(session({
    secret: 'keyboard cat',
    resave: false,
    saveUninitialized: true
}))
By setting up this code, I can now set a session variable, as below.
req.session.challenge = response.challenge;
req.session.save();
And this variable can then be read at a later time, like so:
req.session.challenge
Once these routes and login are set up in authn.js, I can simply import them in server.js, which serves as the main entry point for my application. The full code for server.js can be seen in Listing 1. Let's understand it bit by bit.
Listing 1: The server.js main entry point for my application
import express from 'express';
import dotenv from 'dotenv';
import authn from './libs/authn.js';

const app = express();

// load env
const router = express.Router();
const env = dotenv.config().parsed;

// setup middleware
app.use(express.static('/'))
app.use(express.json());
app.use(express.static('./public'));

app.get('/', function (req, res) {
    res.sendFile('index.html');
});

app.use('/authn', authn);

app.listen(env.RPPort, () => {
    console.log('Your app is listening on port ' + env.RPPort);
});
At the very top, I'm importing Express, which I intend to use to set up my basic web app, followed by dotenv, which helps me work with configuration information. I then import authn.js, which holds my server-side logic for APIs.
I then set up middleware to serve static files. My application, as can be seen in Figure 1, consists of an index.html with some very simple user interface, and three JavaScript files. You can see the full code for my index.html file in Listing 2. As can be seen, two of those files are libraries and the user interface is super simple. These files are served without authentication using the three lines under the set-up middleware comment in Listing 1.
Listing 2: Appsettings.json
<!DOCTYPE html>
<html lang="en">

<head></head>

<body>
    <input type="text" id="username" value="sahil@localhost.com" />
    <button id="registerButton">Register</button>
    <button id="loginButton">Login</button>

    <br/>
    <pre><div id="userMessage"></div></pre>

    <script src="/js/base64Url.js"></script>
    <script src="/js/jquery.js"></script>
    <script src="/js/client.js"></script>
</body>

</html>
Finally, let's talk about /libs/user.js. This is my database of exactly one user. I told you this was demo code. I didn't want to bother setting up a database, so I hard-coded a user here. The code for users.js can be seen in Listing 3. The thought here is that I'm wiring an application where the user's list is already known. Let's say an admin has set up the users, and the user is expected to perform registration followed by log in. During registration, the user could provide a secret, etc. but I'm not going to bother with that for demo code. The users.js file creates a JSON object that acts as my poor-man's database. Now, given a username, I can simply look up a user in server-side code, as below, and work with the user.
Listing 3: users.js
let users  = {
    "sahil@localhost.com" : {
        id: "1234",
        name: "Sahil Malik",
        displayName: "Sahil Malik",
        credentials: []
    }
}

export default users
const user = users[req.body.username]
I can even modify the user by adding to the Credentials property, and when I stop debugging, my user object resets back to its original state.
The structure of the user object is driven by the WebAuthn standard.
The id provides the user handle of the user account. A user handle is an opaque byte sequence with a maximum size of 64 bytes, and isn't meant to be displayed to the user. This ID can be considered unique and decisions are to be made based on this ID, not based on display name or name. It's recommended to use a completely random value of 64 bytes for this ID. I have hard-coded this to 1234 as a shortcut.
The name and displayName are properties of the user account during registration, which is a human-palatable name for the user account, intended only for display. In my application, I've set this to “Sahil Malik”. You can imagine that in self-service sign ups, the user can specify their own name.
The credentials property is interesting. It stores the list of credential objects for the user. For instance, if the user registers an iCloud passkey, a YubiKey credential, a Chrome profile passkey, and a BLE and NFC passkey using their Samsung phone, the user will now have five credentials for the same RP (relying party). For my application, I'm going to restrict the user to only one credential. If you did have multiple credentials, the server can specify which credentials are allowed or disallowed. Additionally, the WebAuthn standard has the ability to automatically allow the user to pick the last used key, or to prompt the user to pick from a list of keys, and limiting that list by excluding certain credentials, as needed.
You can imagine that this would be useful where a certain action can be allowed with an iCloud passkey. But for certain elevated actions, you require a YubiKey with attestation, etc. Attestation is built into the FIDO and WebAuthn protocols, which enables each relying party to use a cryptographically verified chain of trust from the device's manufacturer to choose which security keys to trust, or to be more skeptical of, based on their individual needs and concerns.
In their current form, passkeys offer no attestation. In enterprise scenarios, attestation can be customized and controlled as I blogged about here: https://winsmarts.com/passkeys-and-enterprise-authentication-750ee6332c25. Alternatively, you can also have pre-registered hardware keys, so when I mail you a key, you must register the specific key I mailed you, not just any key you bought from a store. This can be useful if you wish to have greater confidence in the hardware keys being used in your enterprise, for instance, if you don't want keys with user flashable ROM because that kind of defeats the purpose. Or you don't want software keys because they can be easily shared across the internet. Locking all that down is what attestation is designed to do.
Another way to look at this is: If you want greater security at the risk of usage, you'll require tighter and more controlled attestation. But if you wish to have consumer scenarios and offer the least friction and widest audience, you'll require no attestation. Even with no attestation, you're still more secure than the nicest, most complex password you can use. So it's still a win over what we do currently. This is why passkeys are sometimes called a password replacement.
For the purposes of this article, though, I'll require no attestation. I hope to talk more about attestation in future articles.
Before I go much further, let's talk a bit about the credential object though. The credential object is also expected to be in a certain format. A user is associated with an array of credentials, which I will limit to one, for simplicity. The credential object contains the following properties: a unique ID identifier, an attestation type, the type of transport used, credential flags, and related authenticator information.
The credential object has an ID that uniquely identifies the credential. If the RP insists on a certain operation requiring a credential of a certain quality, it can pass these IDs as an array in the allowedCredentials property to the client.
Each credential also has an attestationType that identifies the attestation format used by a certain authenticator when the credential was created.
The credential also contains the transport used, which can be USB (a USB key), NFC (near field communication), BLE (bluetooth low energy), hybrid (a mixture of one or more transports), or internal (an authenticator that cannot be removed from the device).
The credential contains credential flags, which help you identify whether the user was present or verified during authentication and registration. Presence means that the user has to touch a key, and verification means that the user has to touch a key and prove who they are via a PIN or biometrics. Additionally, a key can be back-up eligible, which determines whether a key can synch between devices, such as iCloud passkeys.
Finally, there's authenticator-related information for each credential, which consists of several items. Authenticator-related information includes an AAGUID (authenticator attestation global unique identifier) that's the unique identifier stored as an array of the authenticator model being sought.
The authenticator information also includes signCount (the signature counter value) and clone warnings, which help the RP detect cloned keys. With each new log-in operation, the RP compares the stored signCount value with the new signCount value returned in the assertion's authenticator data. If this new signCount value is less than or equal to the stored value, a cloned authenticator may exist, or the authenticator may be malfunctioning. The clone warning is a signal that the authenticator may be cloned; in other words, at least two copies of the credential private key may exist and are being used in parallel. RPs should incorporate this information into their risk scoring. Whether the RP updates the stored signCount value in this case or not, or fails the authentication ceremony or not, is RP-specific.
The authenticator also contains an AuthenticatorAttachment property that allows the RP to express which authenticators the RP prefers, and the client only shows a preferred list of authenticators to the user. For instance, I may be okay with using iCloud but not Chrome profiles, etc.
With all this background of my project structure, now let's focus on building the application.
Overall Application Logic
My application consists of two steps. The first is registration, the second is log in. During registration, the client-side JavaScript is expected to call the beginRegistration API, which generates a challenge on the server side along with other preferences that the RP requires for an acceptable credential. The client then calls the navigator.credentials.create API to generate a credential that's passed to the server in the endRegistration call. The endRegistration call validates if the generated credential is acceptable, and if it is, it saves the credential on the user object and informs the user of a successful registration.
Once the user is registered, the user can attempt to log in. Logging in, again, has two steps. The first is a call to the beginLogin API, which generates a challenge on the server and passes acceptable authenticator details to the client. The client then uses the navigator.credentials.get method according to the return value of log-in expectations from beginLogin, and sends back the proof of authentication to the server in the endLogin API call. This is then verified against attestation expectations based on the stored credential and generated challenge, and if it passes, the user is logged in.
This is, in summary, how FIDO2 and WebAuthn work. Let's see this in action.
Registration
First, let's focus on registration starting with the client side. Looking at Listing 2, when the user enters their userID and presses the Register button, you call the server-side beginRegistration method, as shown below.
var credOptionsRequest = {
    username: $("#username").val()
};
var credentialCreationOptions = await _fetch('/authn/beginRegistration',
    credOptionsRequest);
The _fetch method is a simple helper method I've written to encapsulate a POST call.
The idea is that the client has expressed interest in registering the username identified and is asking the server for information on what kind of credential is acceptable. The server then uses the fido2-lib npm package to generate a response. Within the response is contained a challenge and other details, such as the displayName that's shown to the user. I'll omit the Node.js code because you can easily figure that out using the documentation of the fido2-lib project. The JSON object of interest that kickstarts the authentication can be seen in Listing 4. There are a lot of interesting details here. The “rp” identifies the relying party that the browser will ensure matches where the site is running. This pretty much eliminates phishing. The user property contains information about the user, which is shown to the user during registration. This can be seen as the username “Sahil Malik”, as shown in Figure 3.
Listing 4: Begin Registration request
{
    "rp": {
        "name": "localhost",
        "id": "localhost"
    },
    "user": {
        "id": "1234",
        "displayName": "Sahil Malik",
        "name": "Sahil Malik"
    },
    "challenge": "ihOh6rCD92TOxZNAil1PGG7txJswOqTKSNoItJjG32s",
    "pubKeyCredParams": [
        {
            "type": "public-key",
            "alg": -7
        },
        {
            "type": "public-key",
            "alg": -257
        }
    ],
    "timeout": 1800000,
    "attestation": "none",
    "authenticatorSelection": {
        "authenticatorAttachment": "platform",
        "requireResidentKey": false,
        "userVerification": "preferred"
    },
    "excludeCredentials": []
}
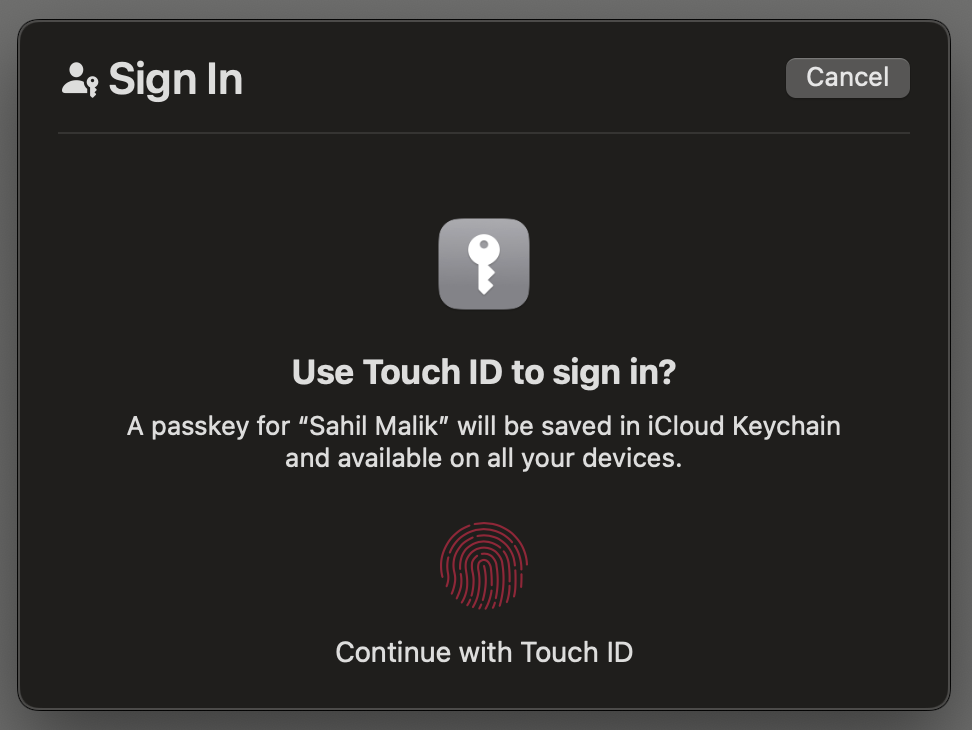
The challenge is a unique string generated on the server side that the client must use in generating the credential. In the endRegistration leg, I'll verify that the same challenge was used as was generated on the server. The timeout mentions the milliseconds within which the registration must be completed. It requires no attestation, and I've specified certain characteristics of the authenticator I'm okay with. Specifically, I'm saying that I want platform authenticator. Because I'm on a Mac, I'm prompted to use TouchID, as can be seen in Figure 3. Now the user performs TouchID (or FaceID if you are on iOS or Windows Hello on Windows, etc.), and this generates a credential.
This credential is sent to the server in the /endRegistration call and can be seen below.
{
    "username": "sahil@localhost.com",
    "id": "wTRhXyFYEo3w15Oxpg-XYZSyYDg",
    "rawId": "wTRhXyFYEo3w15Oxpg-XYZSyYDg",
    "type": "public-key",
    "response": {
        "attestationObject": "..",
        "clientDataJSON": ".."
    }
}
The attestationObject and clientDataJSON properties help the server verify if this registration is valid, and if so, it's added to the credential array on the user object. The code for verifying and adding the credential to the user object can be seen in Listing 5. As can be seen in Listing 5, a successful registration is sent to the client. In the real world, you'll just say “successful registration.” The public key is something you can use to verify future authentications. Although you shouldn't just share it with the client on the browser, leaking it isn't a security issue. This is built on an asymmetric key signature; as long as the private key is safe, you are good.
Listing 5: End Registration
const user = users[req.body.username]
const clientAttestationResponse = { response: {} };
clientAttestationResponse.rawId =
  coerceToArrayBuffer(req.body.rawId, "rawId");
clientAttestationResponse.response.clientDataJSON =
  req.body.response.clientDataJSON;
clientAttestationResponse.response.attestationObject =
  coerceToArrayBuffer(req.body.response.attestationObject,
  "attestationObject");

const attestationExpectations = {
    challenge: req.session.challenge,
    origin: env.RPOrigin,
    factor: "either"
};

const regResult = await f2l.attestationResult(
 clientAttestationResponse, attestationExpectations);

const credential = {
    credId: coerceToBase64Url(regResult.authnrData.get("credId"), 'credId'),
    publicKey: regResult.authnrData.get("credentialPublicKeyPem"),
    aaguid: coerceToBase64Url(regResult.authnrData.get("aaguid"), 'aaguid'),
    prevCounter: regResult.authnrData.get("counter"),
    flags: regResult.authnrData.get("flags"),
    type: 'public-key'
};

user.credentials.push(credential)
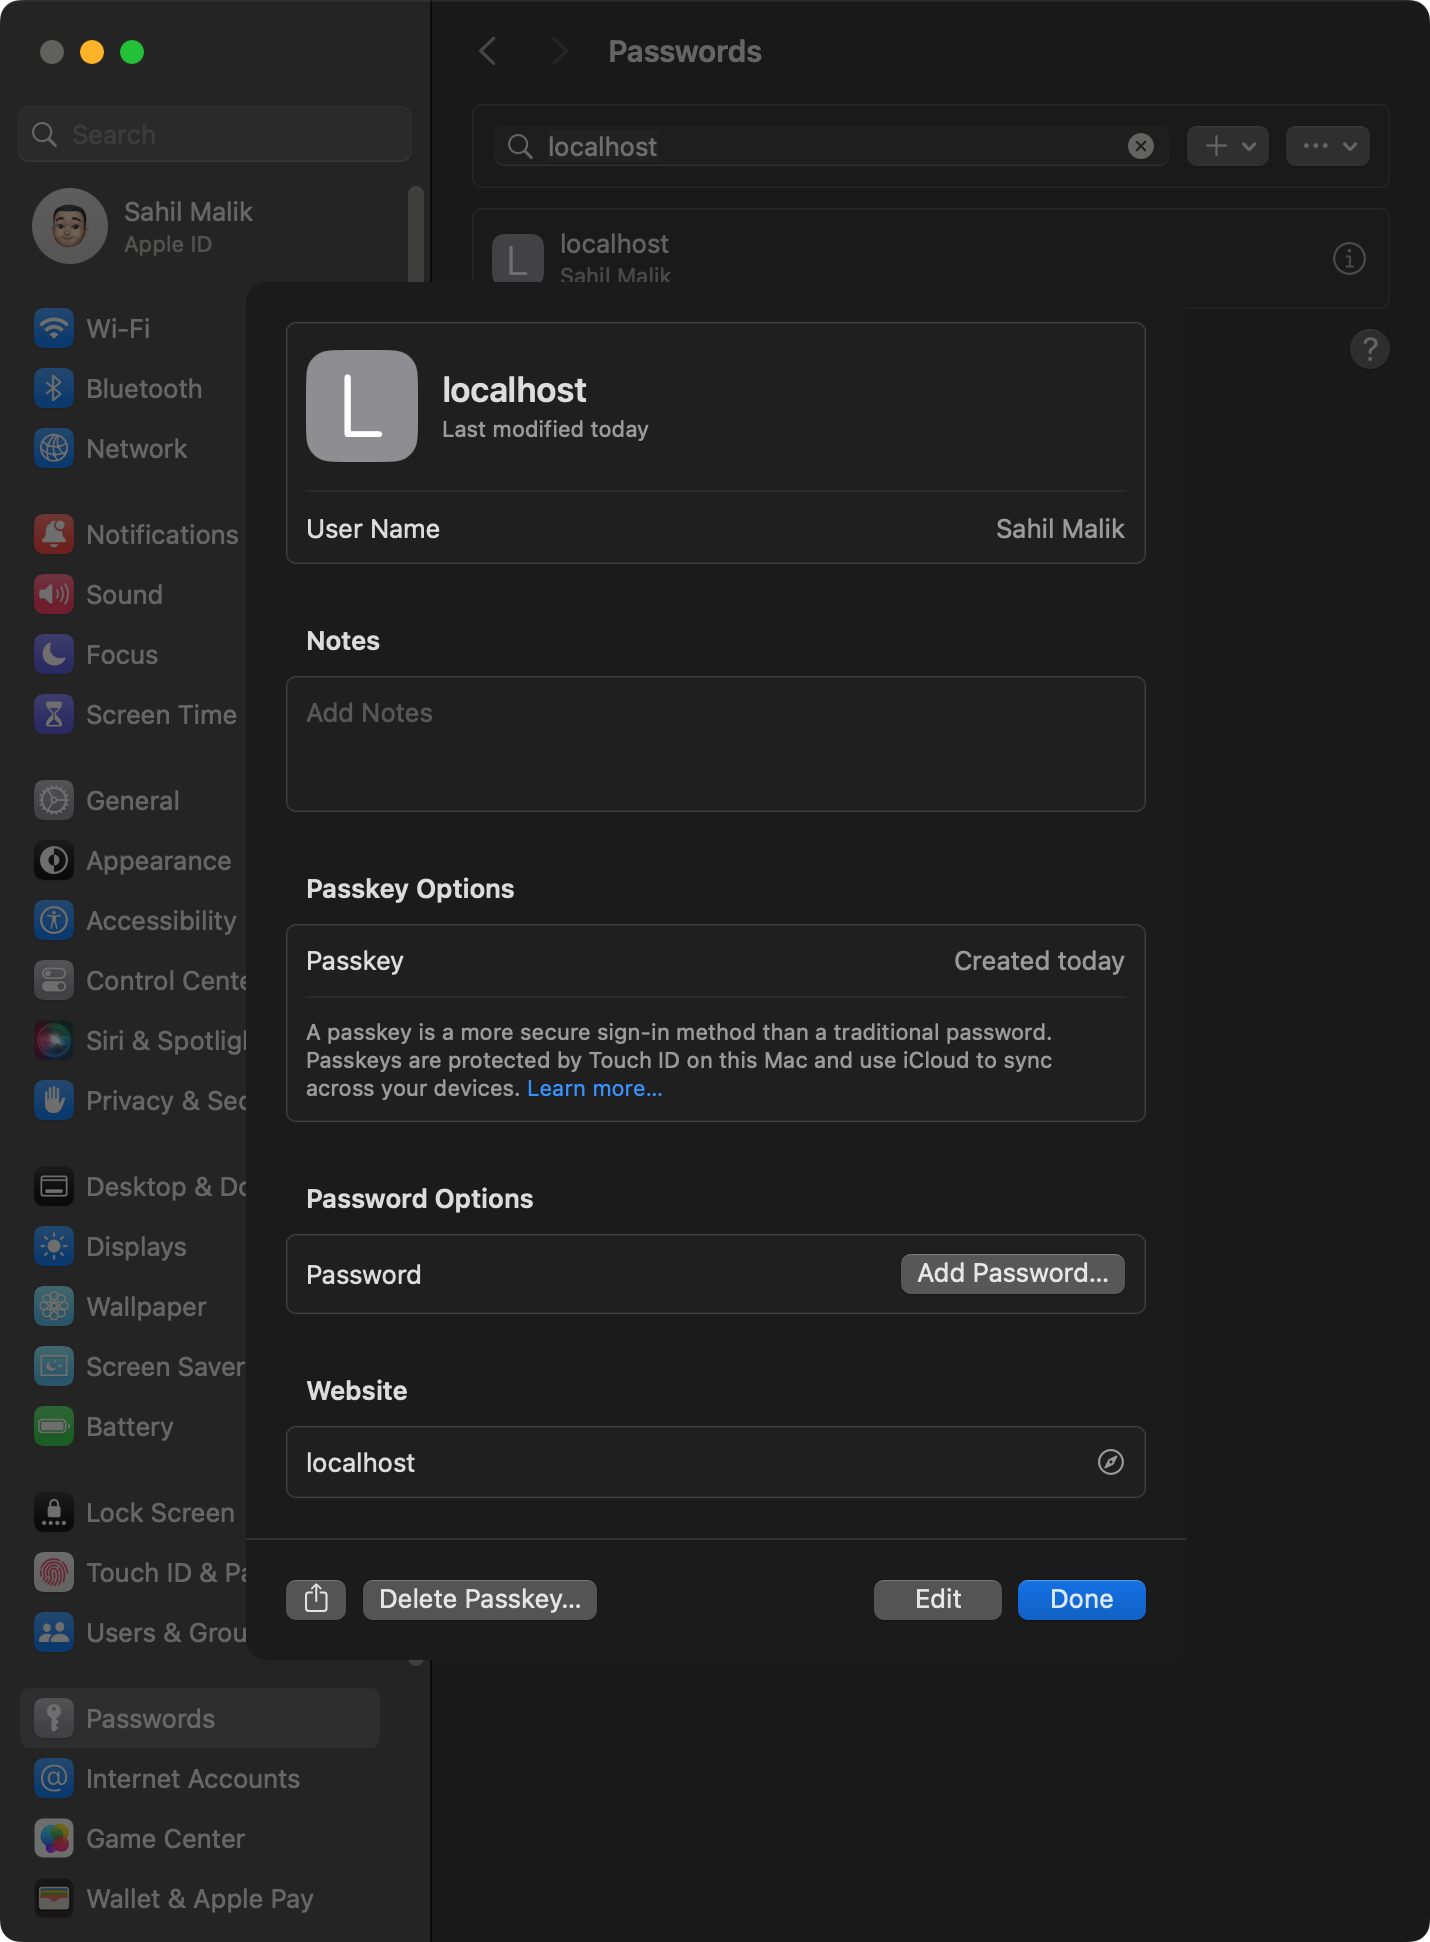
Because the registration succeeded, a passkey has now been created for me. I can verify this in my MacOS system settings, as can be seen in Figure 4.
Additionally, because this is a passkey, I can also see it synched to my iPhone in the same iCloud account, as can be seen in Figure 5.
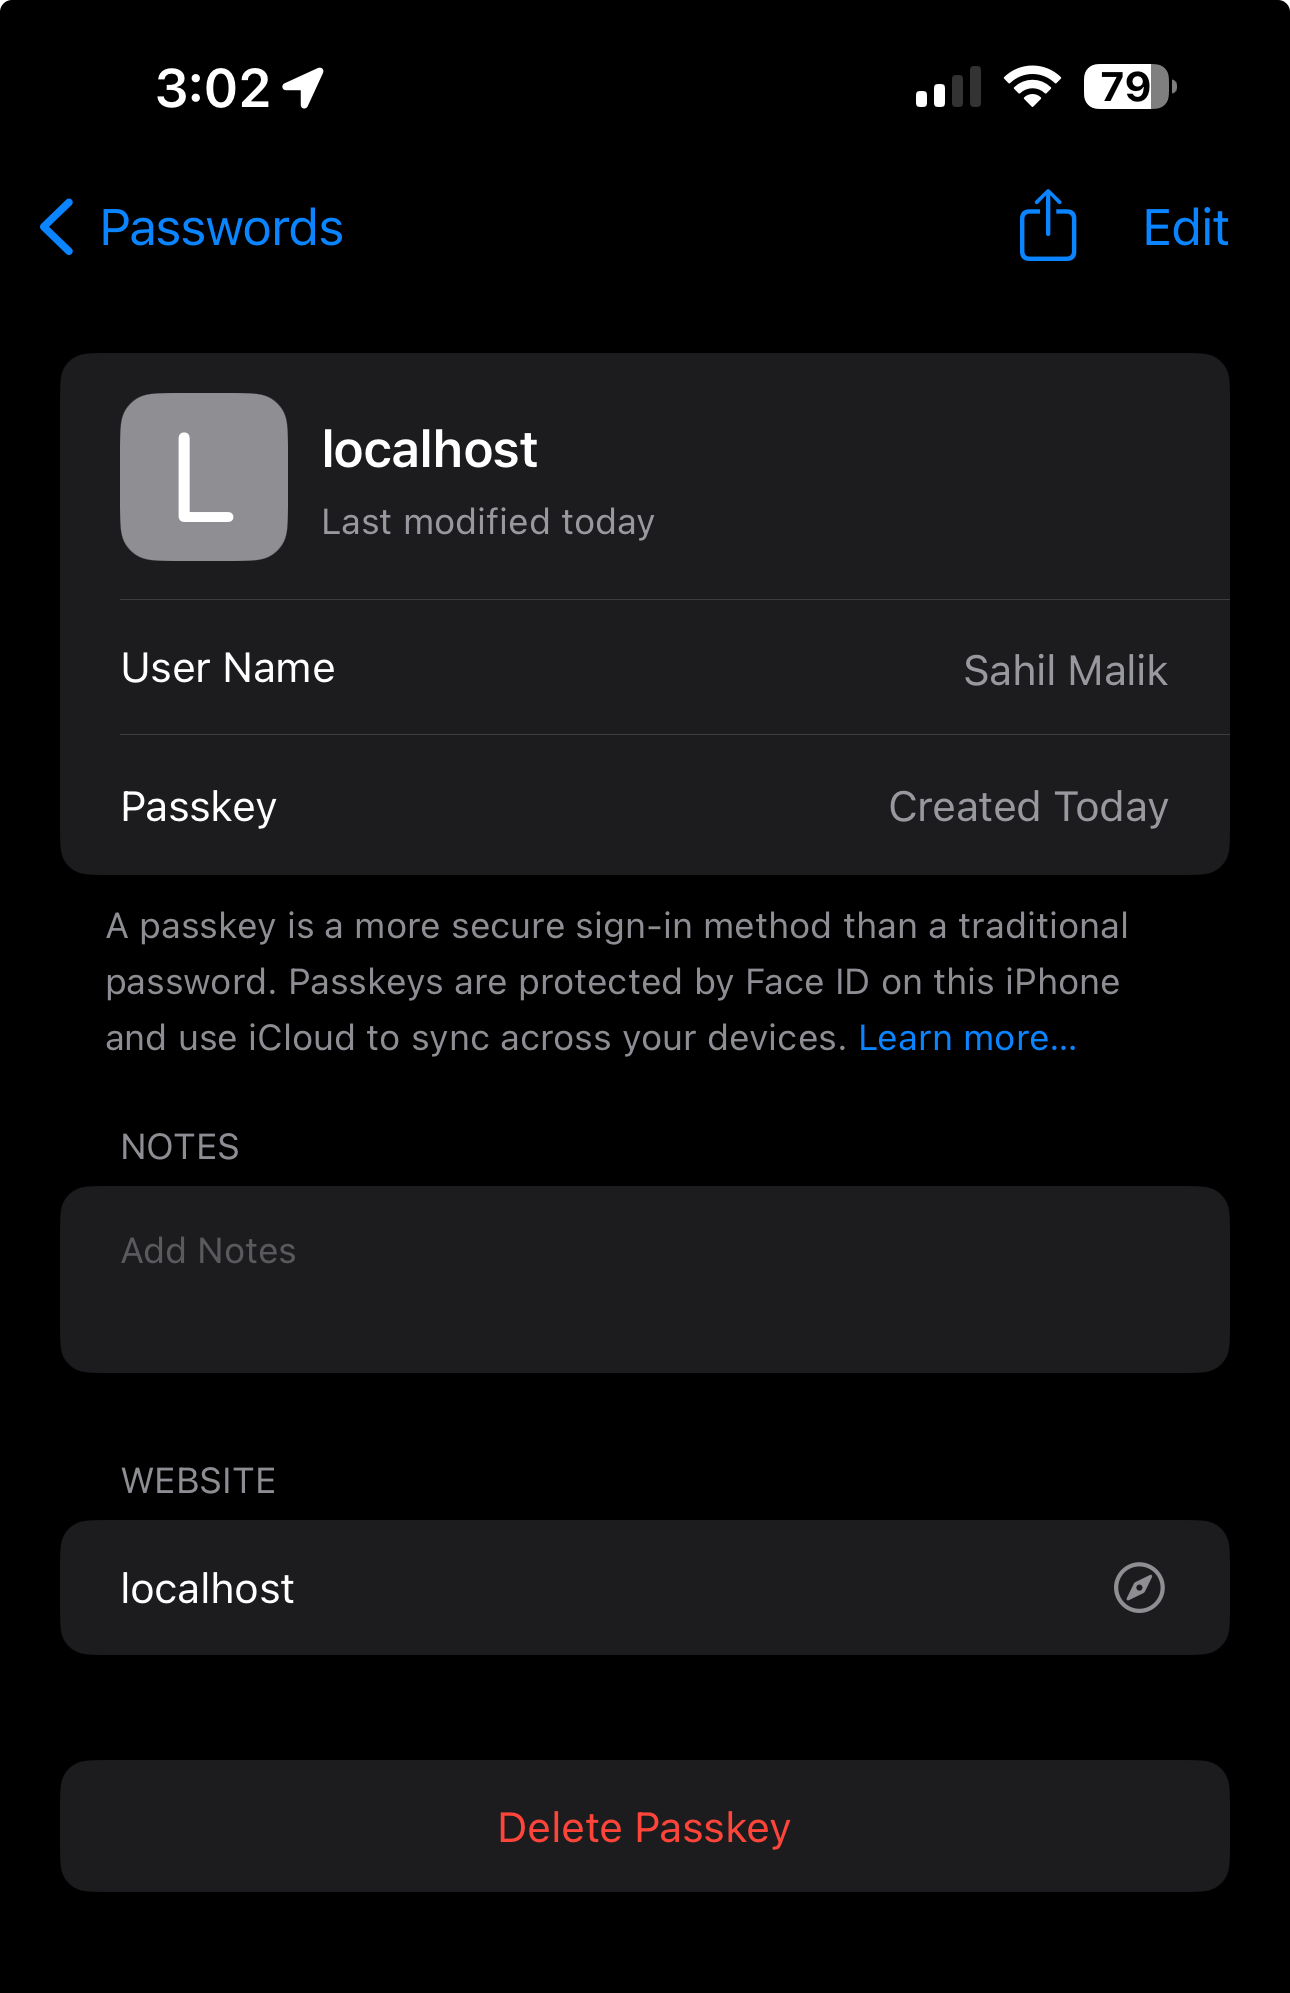
This is the beauty of this standard. Sign up was easy, I can use the credential anywhere, and there's no password to remember. Yay!
Authentication
With registration done, now let's focus on authentication.
To perform authentication, the user is expected to enter their username, which then sends off a call to the beginLogin method. The beginLogin method simply communicates to the server that a certain user is trying to sign in.
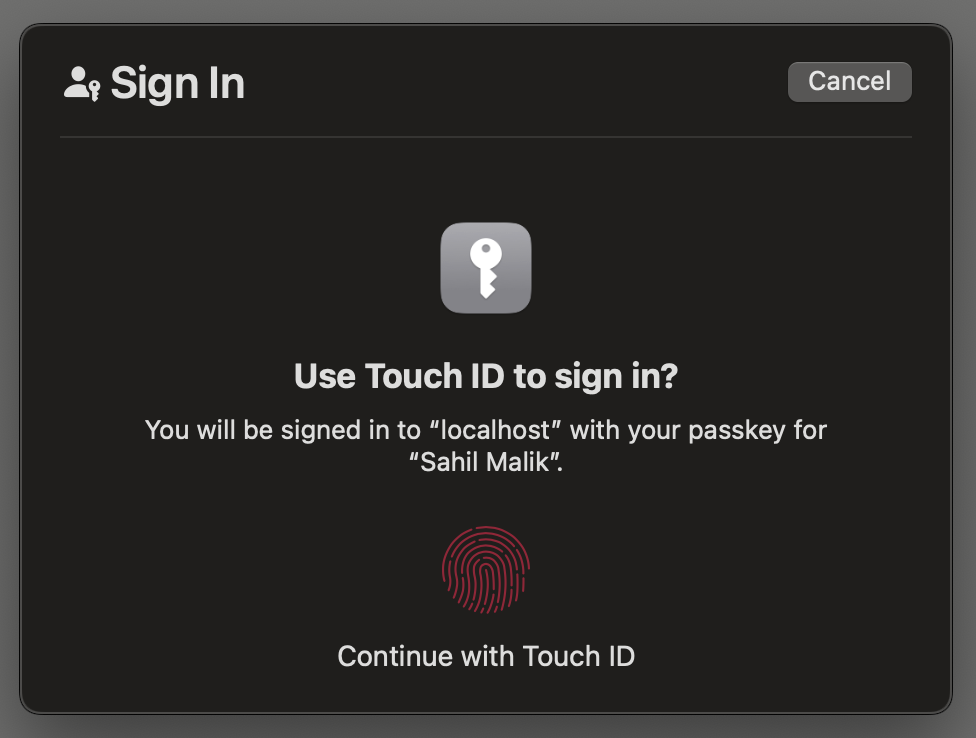
The server is now expected to generate and remember a challenge, and for the user to specify certain authentication requirements, which are communicated back to the client, as can be seen in Listing 6. Using these specifications communicated by the server, the client makes a call to the navigator.credentials.get method. This shows the user a login dialog box, as can be seen in Figure 6.
Listing 6: Initiating the login sequence
{
    "challenge": "..",
    "timeout": 1800000,
    "rpId": "localhost",
    "userVerification": "preferred",
    "allowCredentials": [
    {
        "credId": "wTRhXyFYEo3w15Oxpg-XYZSyYDg",
        "publicKey": "..",
        "aaguid": "-_wwBxVOTsyMC24CBVfXvQ",
        "prevCounter": 0,
        "flags": {},
        "type": "public-key"
    }
    ],
    "authenticatorAttachment": "platform"
}
What if I'd said “authenticatorAttachment” to be cross-platform? Well, then you'd be prompted with a different dialog box, one that prompts you to use NFC or BLE, and lets you scan a QR code, etc., to complete authentication on a phone. Or perhaps a Chrome profile. Note that I've also included the allowCredentials object to limit which credentials my RP is okay accepting.
The user is now expected to complete the touchID operation, which generates an assertion response that's sent to the server in the endLogin API call. Here the server validates the assertion received with what you expect. This can be seen in Listing 7. And if the assertion succeeds, you send back the authentication result, as can be seen in Figure 7.
Listing 7: Validating an assertion
const user = users[req.body.username]
const assertionExpectations = {
    challenge: req.session.challenge,
    origin: env.RPOrigin,
    factor: 'either',
    publicKey: user.credentials[0].publicKey,
    prevCounter: user.credentials[0].prevCounter,
    userHandle: req.body.response.userHandle
};
req.body.id =  coerceToArrayBuffer(req.body.id, "id");
req.body.rawId =  coerceToArrayBuffer(req.body.rawId, "rawId");
const authnResult = await f2l.assertionResult(req.body, assertionExpectations);
res.json(authnResult);

Congratulations! You just registered and signed in using a passkey.
Summary
Perhaps the expression “passwordless” has been overused in our industry. We've seen major companies use mobile authenticator apps and call them passwordless. Okay, they were technically passwordless, but it isn't until FIDO2, that we have true password replacements that are universally accepted across the industry. With the advent of passkeys, I fully expect that every major site that cares about security will adopt it as the standard replacement for passwords. As users and organizations get comfortable with the standard, I also expect this to get widely adopted in enterprises in more secure implementations that support attestation and end-to-end supply chain security.
I think it's also important to realize that passkeys are a password replacement. They are better than any password that you can come up with. Used alone, they're still just a password replacement. When you replace them with a hardware-based authenticator, you're already using a much more secure mechanism that cannot be scaled in an attack. Remember that passkeys can be shared via iCloud family sharing, and your passkey is just as secure as your iCloud account. In contrast, hardware key sharing is not an attack that can scale easily and certainly cannot be shared across the internet. Additionally certain hardware keys now support biometrics or entering pins. This makes them equivalent to multi-factor authentication, something you have - the key - and something you know - the pin.
However, nothing stops you from using passkey as one of the factors in authentication. Really, what stops you from accepting a user's passkey and then prompting them from an MFA prompt on their mobile phone using an OAuth-compatible app? Isn't this multi-factor, where you've replaced one of the weak factors, the password, with a much more secure replacement, which is passkey?
Implementations like this are going to offer user convenience and greater security in one swoop. This is the holy grail of security where you provide solutions that are convenient, so users don't work around them, and that are secure by design. This is why I feel the standard will gain universal acceptance and why the entire industry is behind it.
I hope you found this article useful. I know this was a little bit code heavy, but we're developers and we like to see code, right?
Until next time, secure coding.
