Visual FoxPro 9 includes a number of IDE enhancements that make its already rich development environment considerably richer.
Visual FoxPro 9 facilitates development in a client/server world with a new feature called the Data Explorer.
Every version of FoxPro has always included a number of enhancements to the IDE and Visual FoxPro 9 is no exception.
Fonts and Colors Everywhere
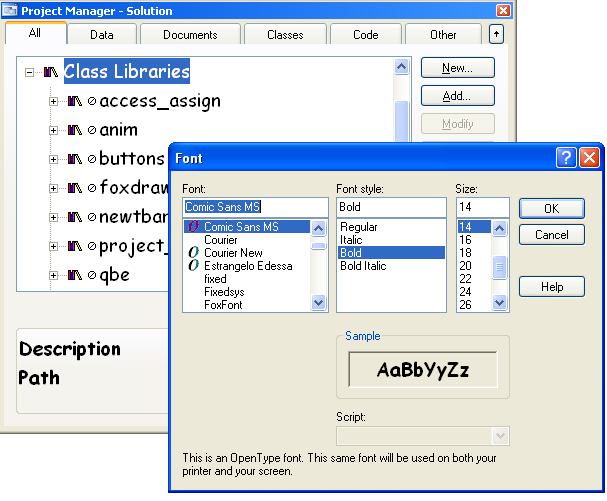
One major enhancement to the UI is the ability to configure fonts that are used in many designers and dialog boxes. Visual FoxPro 9 allows you to configure the font used to display items in the Project Manager. To change the font for your projects, right-click on your open project and select Font... from the shortcut menu. This activates the Windows Font dialog box, from which you can specify the font, style, and size you wish to use. Figure 1 shows the Visual FoxPro Project Manager with the Comic Sans font, 14pt, and Bold selected.
Microsoft didn't stop with just the Project Manager, of course. You can also specify the display font for the Properties sheet. In previous versions of Visual FoxPro, you were limited to changing the font from small to medium or large. You now have full control over the font in the Properties sheet. You can right-click the Properties sheet and select Font... from the shortcut menu to activate the Windows Font dialog box just like you did with the Project Manager.
You can specify colors for ActiveX properties, non-default values, custom properties, and instance properties.
Another enhancement to the Properties sheet is the ability to specify the colors for different categories of properties. You can specify colors for ActiveX properties, non-default values, custom properties, and instance properties. To specify the colors for custom properties:
- Right click on the Properties sheet.
- Select Custom Properties Color... from the shortcut menu.
- Select the color from the Windows Color dialog box.
Figure 2 shows the Properties sheet with a custom property displayed in red.

Class Upgrades
Visual FoxPro 9 added one much-desired feature to its Class designer. You can now specify default values for custom properties added to your classes. To specify a default values for your custom property:
- Open your custom class from the Project Manager or type MODIFY CLASS in the Command window.
- Select Class then select New Property from the Visual FoxPro menu.
- Specify the name of your property.
- In the Default/Initial Value field, enter the new default value (as shown in Figure 3).
- Click Add.

You should now see the new default value for your property in the Properties sheet (see Figure 4).

Data Exploration
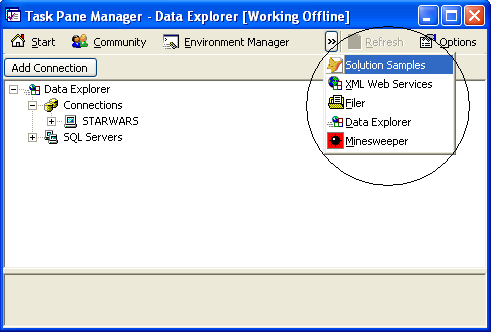
As you know, Visual FoxPro works very well with data. Visual FoxPro 9 is especially well-suited to working in client/server development environments. Visual FoxPro 9 includes tools to help facilitate development in a client/server world with a new feature called the Data Explorer. The Data Explorer is a new tool that is included in the Visual FoxPro Task Pane Manager. To activate the Data Explorer, open the Task Pane Manager from the Visual FoxPro Tools menu and select Data Explorer from the Task Pane Manager's More Panes dropdown list (Figure 5). This activates the Data Explorer in the Task Pane Manager window.
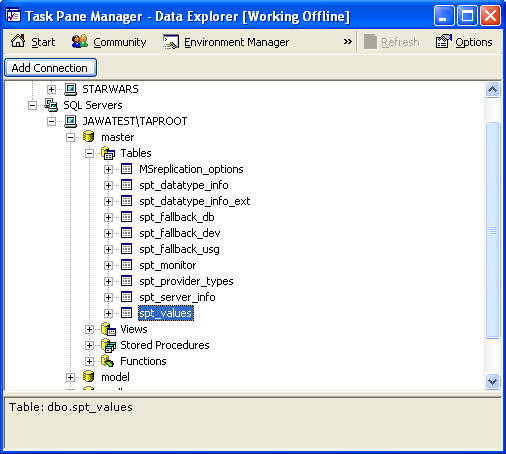
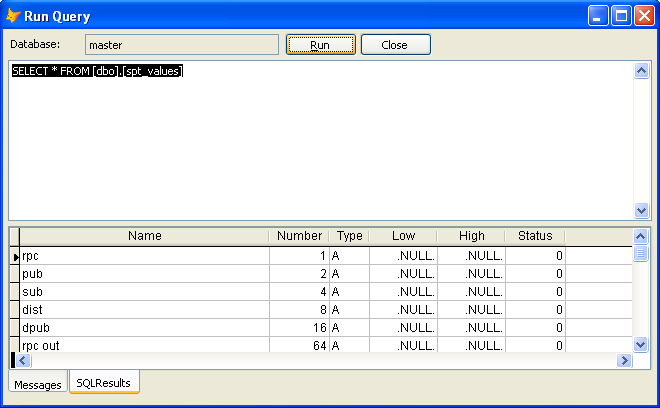
You can now add connections to external databases or use Explorer for databases on your local computer. Figure 6 shows the Data Explorer perusing the Master database. From the Data Explorer, you can query tables by right-clicking on a table and selecting Run Query from the shortcut menu. Selecting Run Query opens the Run Query dialog box (Figure 7), which allows you to execute SQL code in your SQL Server database.
The Data Explorer tool is something that has been sorely missing from Visual FoxPro for some time. Thanks to Microsoft for adding this very necessary feature.
In The Background
Visual FoxPro 9 also includes a major enhancement to the Program Editor. Visual FoxPro 9 has background compilation of code. When FoxPro comes across a syntax error, it underlines it. This gives you the ability to fix code immediately instead of waiting for a compile to run.
You can configure the font used to display items in the Project Manager and the Properties sheet.
VFP9 IDE = More Productivity
Even though this list may be small, the IDE changes in Visual FoxPro 9 pack a real punch. Background compilation prevents bugs at the source, font changes make it easier to see what you are looking for, and the Data Explorer makes dealing with client/server data that much simpler.